Knitting can be such a therapeutic hobby. I love sitting in a quiet place listening to the sound of my knitting needles click clacking as I work through the days thoughts that are swirling around in my head. It’s a great opportunity to decompress and refresh. If we’re being honest though, that’s not always the case. Sometimes knitting can be downright frustrating. A pattern may be asking us to keep track of complicated repeats, we’ve tinked or frogged a project several times, that darn lace chart is just a thorn in our side or the yarn keeps splitting every time we try to knit a new stitch and we just want to call it quits. What about when that stitch marker falls off our project and we don’t know which row we’re on? (Confession: I did that and the hat with a beautiful brim pattern has been sitting in storage for several months because I just can’t stand to look at it and mentally untangle my mess. So much for a new winter running hat!)
When I sit down to knit or crochet, I usually have an idea of what my goals are, but not in a weird nerdy way where I think to myself “Today’s knitting goal is…” When approaching a project we’re usually in a particular mindset though. Sometimes I choose a project for the beautiful detailing integrated in the project, sometimes I’d like to forget about my day and choose a project that requires extreme focus. Other times the project I choose is for passive knitting and something to keep my hands busy when chatting with friends or watching television.
We can set ourselves up for success if the intension is to knit to relax. When I’m seeking a time to just chill out and knit my heart out, then I look for a pattern that’s not going to be overly complicated or above my skill set. Patterns where most of the stitches are understood and repeats are simple are best suited for relaxing knitting. Some of the patterns I choose can also double as good TV knitting, patterns, but generally these are more detailed and have a medium difficulty rating. Of course choosing a project that incorporates mostly known stitches and medium difficulty rating is dependent on your particular skill set and how you usually approach knitting.
We know there are health benefits to knitting and crafting in general. Doing something pleasurable also helps to relax the body and knitting can be soothing. So we love to knit and feel the calmness that comes with creating something beautiful (usually) with a couple of sticks and string, but how do we ensure we choose the right project when knitting to relax?
What I’ve found over the years is to focus on elements within a pattern as opposed to the pattern in it’s entirety when there’s a specific knitting goal in mind. When looking to knit to relax, understand that many patterns vary in complexity within the project itself.
The first sweater I ever knitted included yarn overs integrated into the raglan shaping. I was brand new to knitting, only having knit a dish cloth before starting on that sweater. Was that ambitious? Yes, did it quench my knitting thirst? Yes. I taught myself how to knit with the use of a helpful app and the My First Sweater class on Craftsy. I chose to knit a sweater for myself as my second project because I knew the project would incorporate many skills that would be needed for other knitting projects. I also knew that once I got into the rhythm, it would be relaxing. My first several rows of yarn overs were frustrating, but the ribbing and body of the sweater was a breeze.
Later, once I had a better handle on knitting and how to read and interpret a pattern, I was able to seek patterns based on what I was trying to accomplish. This sweater tank was a simple pattern knit in the round. It was easy and also made for great TV knitting, but it also included a couple little fun details. The front accent was simply made by ribbing. When knitting in the round, I simply had to pause at the stitch markers, knit in the rib pattern and then carry on in stockinette stitch until I reached to sides where the increases and decreases were incorporated.
The simple lovey pattern (pattern review here) was a fun knit and it was perfect to knit for relaxation purposes. The diamond motif pattern that I used for the blanket portion of the lovey was just enough to keep me on my knitting toes and easy enough to provide a mental break from the day.
If you’re looking for great resources to find knitting patterns that lend themselves well to relaxing knitting, we’ve rounded up some of our favorites:
Jo Sharp has some beautiful patterns that are simple to knit and provide beautiful results. I have several of her pattern books and am amazed at the simplicity of her patterns, but have learned the hard way not to over estimate the simplicity. I was knitting a sweater that incorporated an 8 stitch rib-type pattern repeat and realized that somewhere along the line I started working up 10 stitch repeats instead. Whoops!
If you like to make progress quickly on your projects, then one of my favorite pattern sources lately has been a knitting calendar that was given to me as a gift. This calendar includes over 100 different patterns and many of them vary in both complexity and type. Many of the projects are on the smaller side and easy to whip up in a fairly short period of time, so not only are you getting some relaxing knitting time in, but also high satisfaction from completing a project!
The last resource is near and dear to my heart, it’s the first sweater I ever knitted and one of the first knitting projects I ever created. It’s Lion Brand’s My First Sweater pattern. There are several variations on this sweater, you can create a cardigan like I did, or a pullover. You can also choose which sleeve length to knit and choose your favorite collar style. If knitting a sweater would stretch your skill set, then sign up for the Craftsy class that guides you through each step of the way. If you’re a pro at knitting up sweaters in no time at all, then this pattern still deserves a place in your knitting library.
I’d love to hear if you have any favorite patterns or knitting resources. Leave them in the comments below!
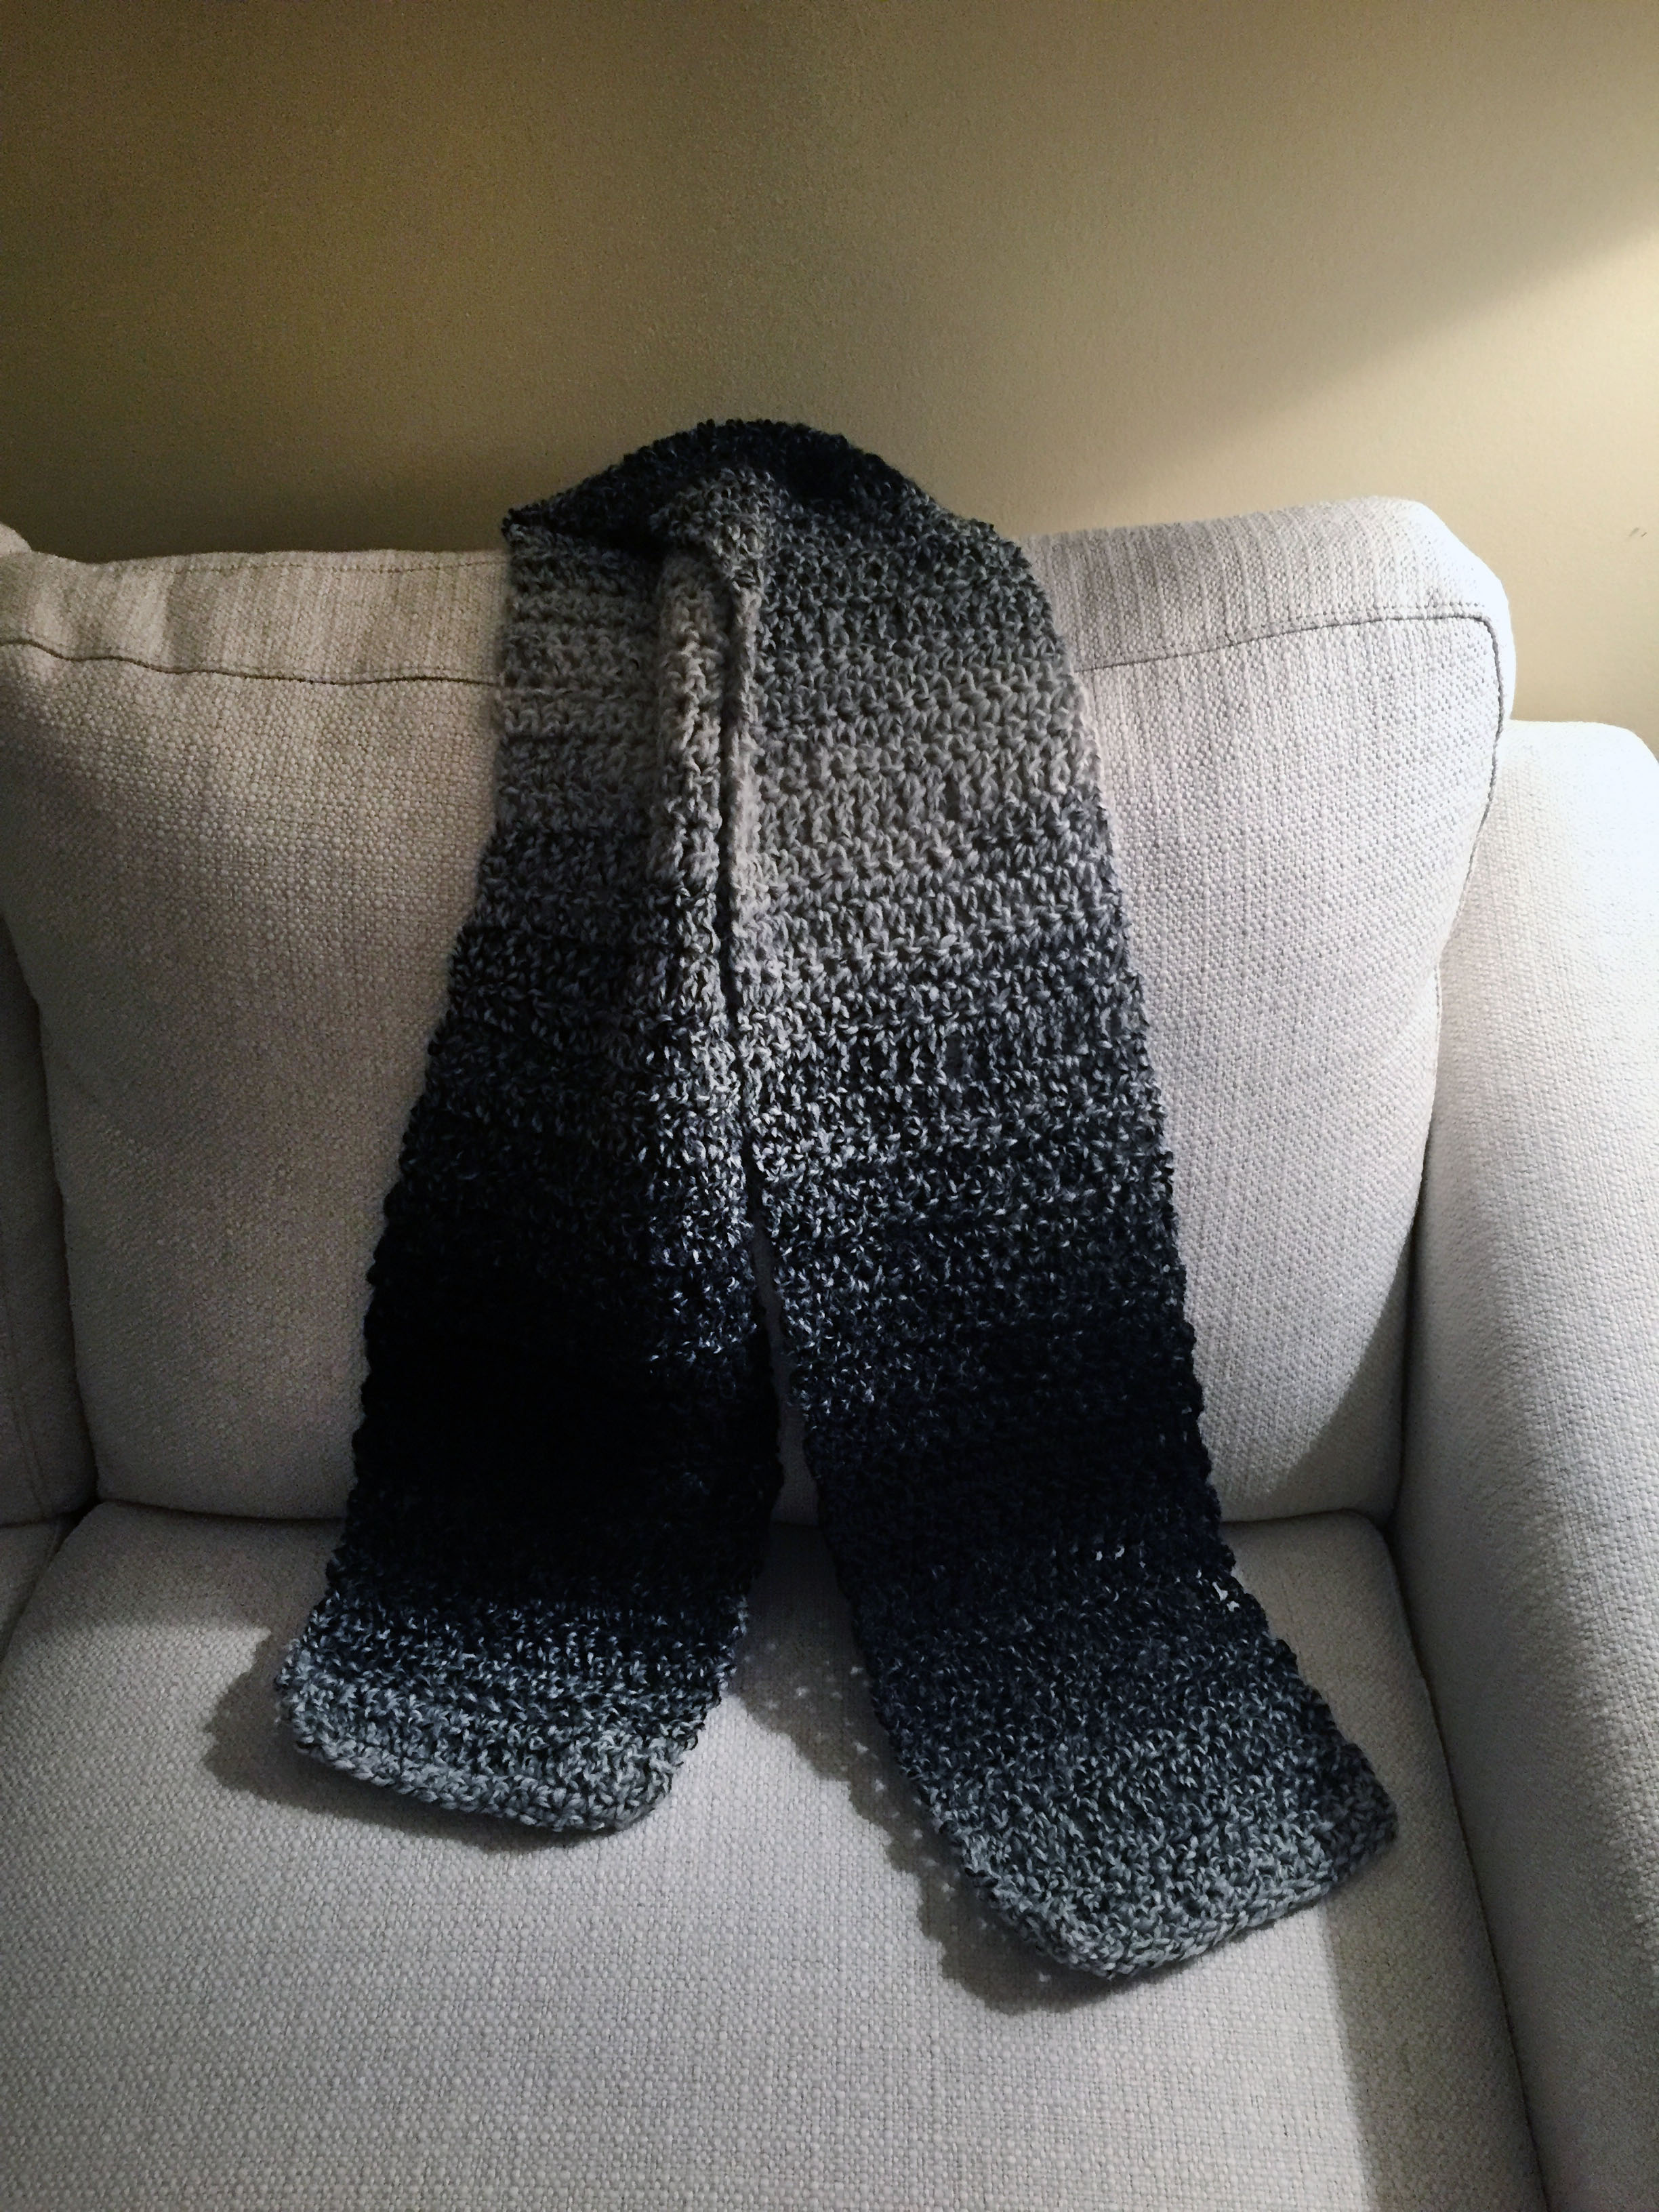
The ombre effect of Lion Brand’s Scarfi yarn adds sophistication to the finished scarf!
Sometimes scarves are one of the simplest gifts to make someone special. There is lots of flexibility in the length, width, color and style. Often times, a pattern isn’t even necessary to create a scarf! Just cast on (or chain) and go! Up until recently, I’d just grab a couple skeins of my favorite yarn from my stash and get started.
I say until recently because not too long ago Lion Brand introduced a game changer to the yarn industry: Scarfie. Scarfie is available in beautiful color combinations and creates a gorgeous ombre effect once it’s worked up. The packaging boasts that you can make one scarf with just one ball of yarn! So is Scarfie everything it’s cracked up to be? Let’s find out!
While creating a scarf with one skein of Scarfie is totally possible, I was seeking to make a thicker scarf and picked up two skeins of the same color way for a gift I wanted to make. The yarn has a beautiful texture and feel to it. The band around the yarn showed a beautiful ombre scarf that I was excited to create!
Scarfie is a bulky weight yarn and is made of an acrylic and wool blend. I found that the fiber combination was a perfect match. The acrylic adds durability to the yarn, keeps the cost down and the wool fibers contribute to the warmth of the fabric once created. The yarn can be machine or hand washed, but it should be laid flat to dry. (Wouldn’t want that wool to shrink up on you!)
This swatch shows how perfectly the ombre effect takes shape when working with Scarfi yarn!
For my project, I chose to crochet my scarf. The yarn band recommended a K crochet hook, so I grabbed my sparkly pink hook, created a slip knot and chained 19. I tend to crochet a bit more loosely than knit and I wanted this scarf to have a nice drape, so I keep my stitches airy and light. Once I got to the end of my chain, I turned and inserted the hook into the second chain from my hook. I worked 17 single crochet stitches across to the end, chained two and started working in double crochet rows. Every so often I’d switch back to a single crochet row or even toss in a triple crochet row. That’s the beauty of working without a pattern. Complete flexibility and improvisation.
The longer my scarf became, the more more beautiful it looked. The simple stitches looked very elegant as they slowly transformed into a sophisticated gradient of color changes.
When working with a color changes within a project, you need to determine if a dramatic color change (were skeins change) is something you’re ok with or something you’d like to avoid. Symmetry is another consideration when color changes come into play.
I wanted my scarf to look as professionally as possible and chose to create a seamless color change when I needed to add a second skein of yarn. To do this, I simply unraveled the new skein of yarn until I arrived at the same color repeat as the working skein and joined the yarn in the appropriate place. After continuing to work, it appeared that I had used the same skein for the entire project!
By working intelligently, you can create a symmetrical color pattern with Scarfi yarn!
Knowing I wanted the scarf to fall at each hip and be symmetrical, I continued to work rows until I was close to the length I needed. Then I examined the color pattern closely. I continued to work the scarf until the color pattern matched! This meant that the scarf was a little longer than originally anticipated, but it worked out great! If you’re looking to get started, grab a skein of Scarfi and crochet hook today!
Happy Valentines Week! Love, flowers and hearts abound as people express their love to each other on February 14th. Truth be told, Valentines Day isn’t a big deal in my home today. However, as a kid, I used to relish everything about Valentines Day. When we woke in the morning, there was always some yummy heart shaped candy waiting for us with a card, reminding us how much our parents loved us. Exchanging valentines day cards with classmates was tons of fun after spending several nights customizing the perfect mailbox to sit on my desk, clearly decorated in hearts too. Hearts, a universal symbol of love and Valentines Day.
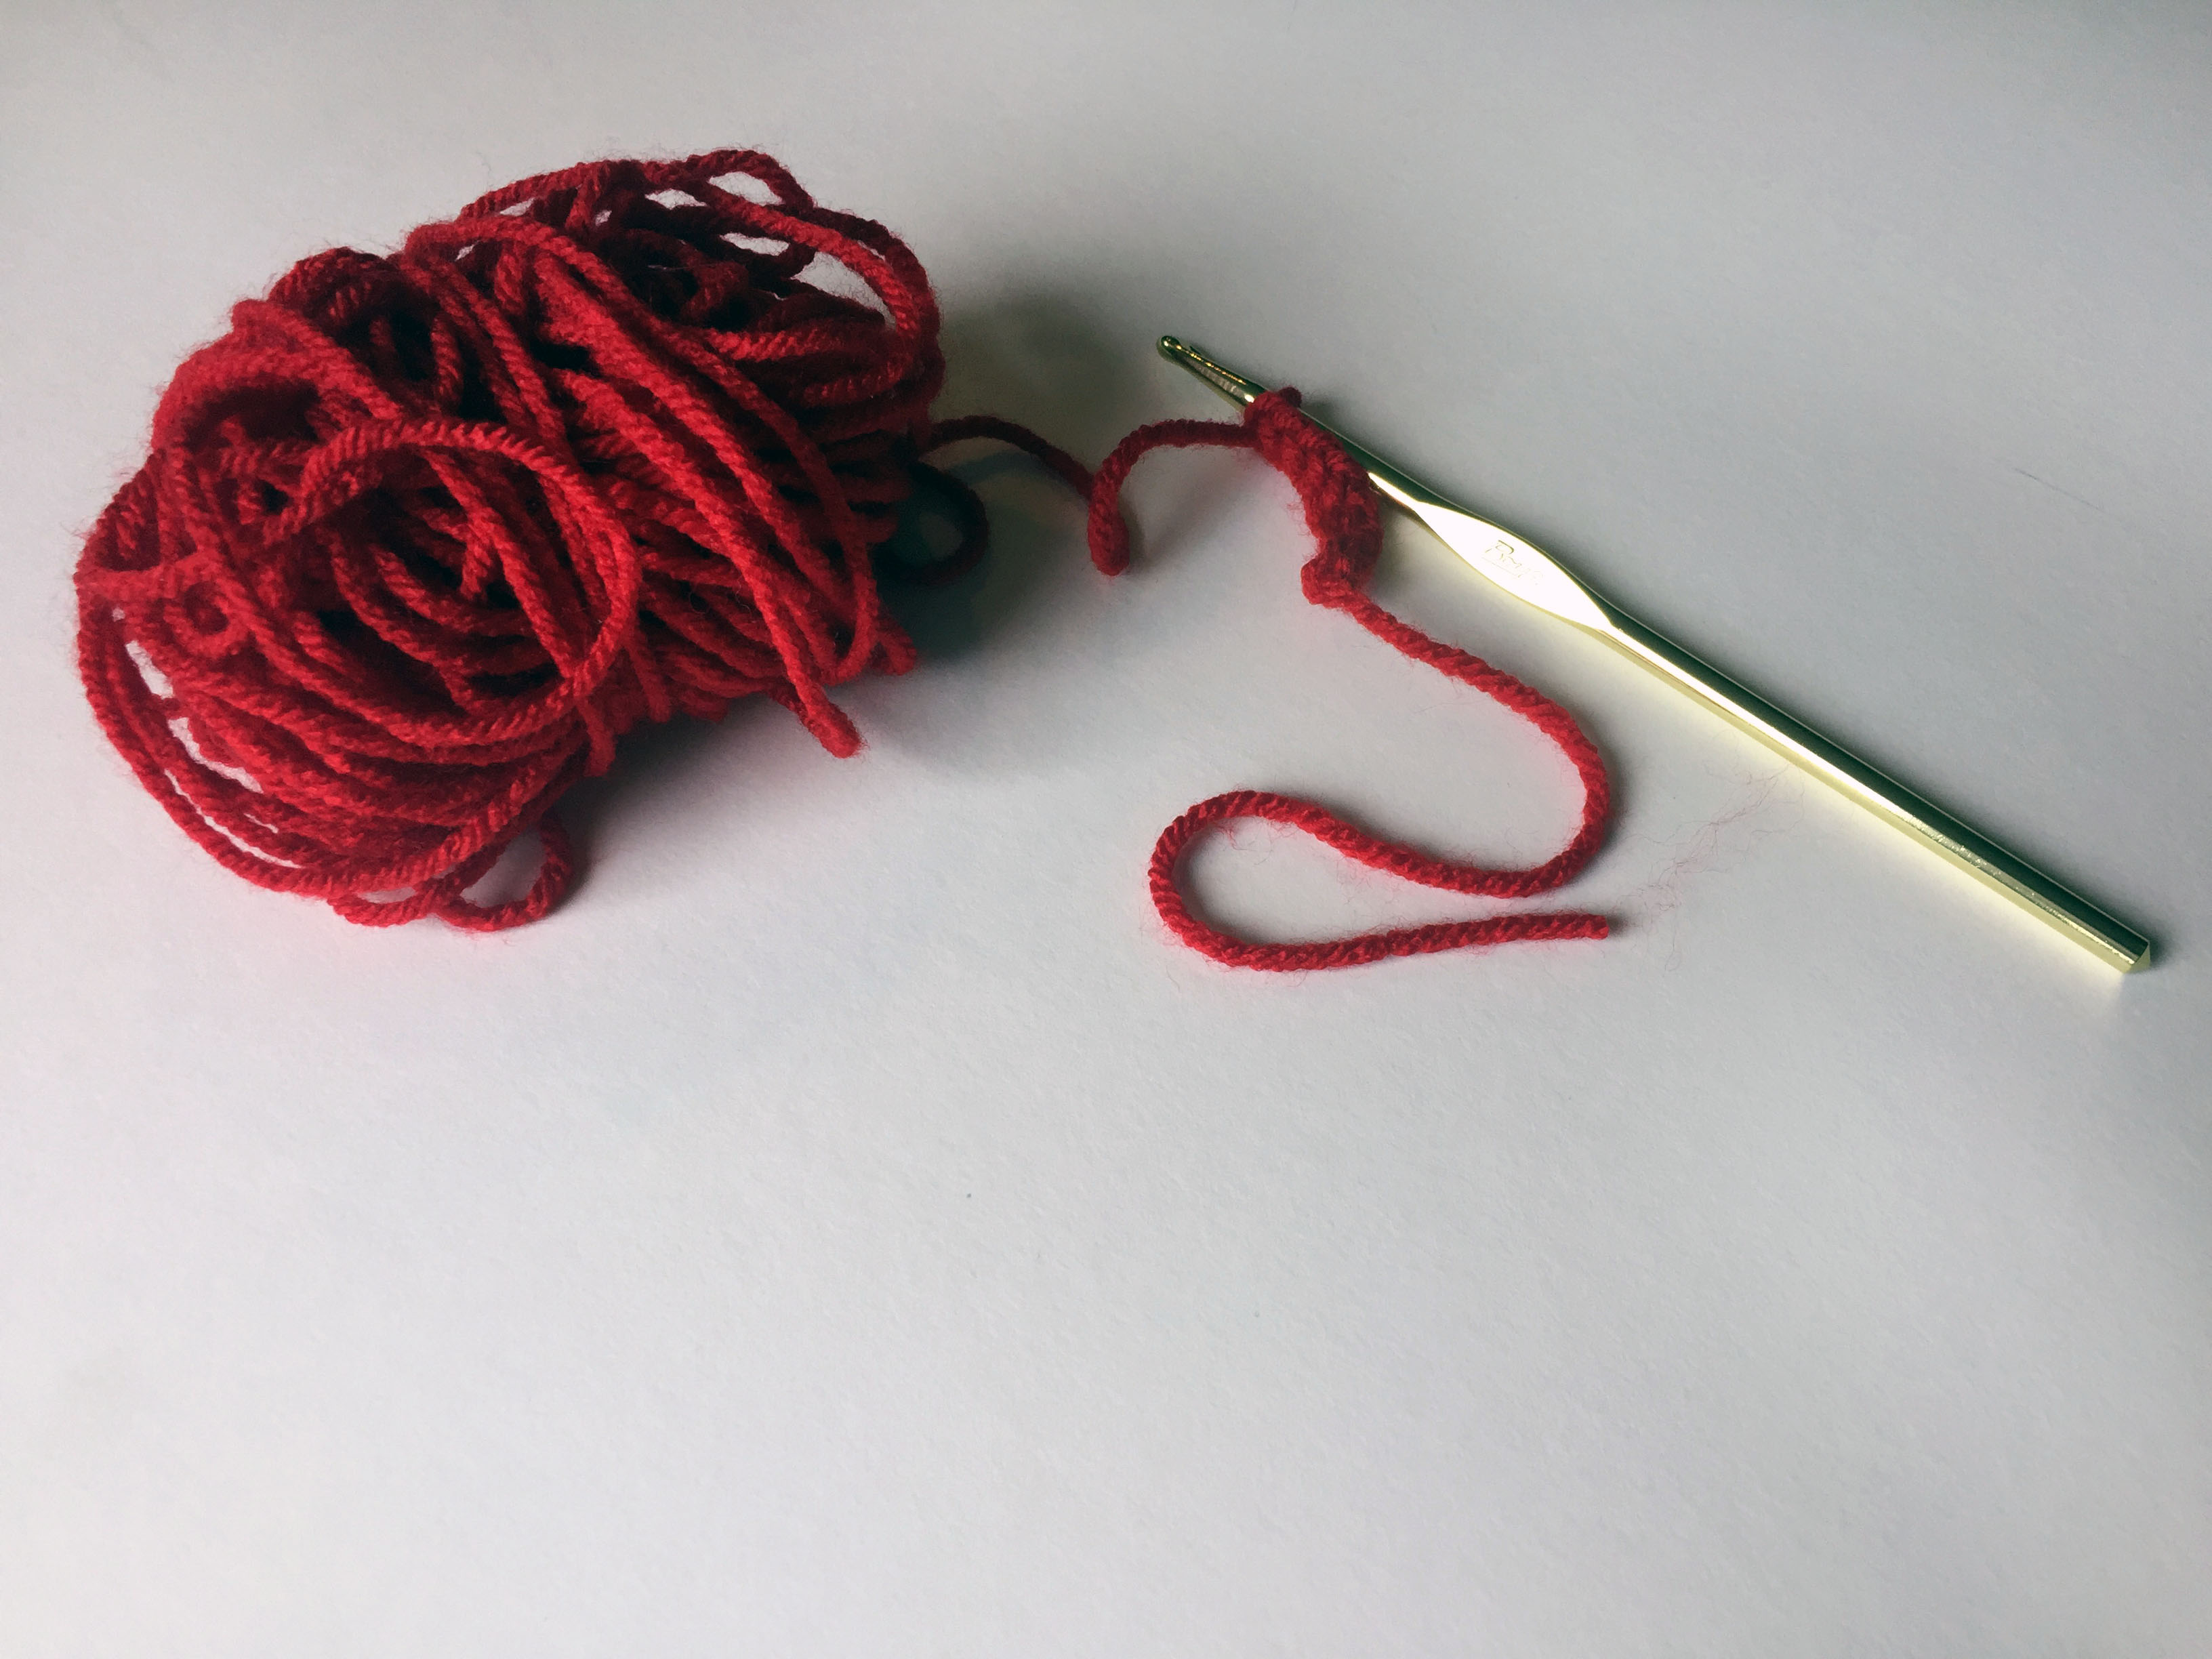
I wanted to whip up something special for Valentines Day this year. These simple and quick crochet hearts can be made into magnets or bookmarks! Both these gifts can be crocheted up in a jiffy and used year round! This pattern is super easy and can not only remind you of your place in a book or magazine or hold papers on the fridge, but also act as a reminder of those you love.
Row 1: Starting with the second chain from hook, 5 sc across, 2 sc in last chain, chain 1, turn
Row 2: 2 sc in first stitch, 6 sc, chain 1, turn
Row 3: sc 6, sc2tog, chain 1, turn
Row 4: Sl st 3, sc 4, chain 1, turn
Row 5: sc 4, chain 1, turn
Row 6: sc2tog, sc 2, chain 1, turn
Row 7: sc 3, chain 1, turn
Row 8: sc2tog, sl st, chain 1, turn
Row 9: sc2tog, fasten off, weave in ends.
The images below show the various steps in order!
Construct a Bookmark
Now is the most complicated part of the whole pattern (not really, I’m just joking 🙂 ). Cut three strands of yarn to approximately 18”-24” in length. Using your crochet hook, pull all three strands of yarn through the end of the heart. Pull the strands so they are equal. Holding two strands of yarn together at the same time, braid the yarn. Tie a knot at one end (We’re such rebels tying knots in our crochet projects!), leaving about half an inch of fringe. Your bookmark is ready!
Create a Magnet
To create a magnet, simply glue the crochet hearts to a simple magnet!
As a child I loved to read. When I’d wake up in the morning and immediately grab the latest Baby Sitters Club book that was sitting on my bookshelf and read in bed for hours. I’d often read the mornings away, deep in the fictional context of whatever drama was plaguing Claudia, Stacy, Kristy, Mallory and Dawn. As time went on, my literary tastes evolved into non-fictional business and strategy books with a random fiction title tossed into the mix based on a rave review from my husband. When I took up knitting, I realized there are multiple ways to read a pattern and I started to read patterns online while trying to visualize how the stitches formed the shaping of the piece. Eventually this lead to knitting books and my collection started to grow… and grow.. and grow…
Reading patterns has really helped my knitting skills to soar and helped me to be able to visualize the construction of a project or understand how to alter a pattern to achieve a desired effect. There are some really great books out there that I’ve learned tons from, and there are other books that require more advanced understanding of knitting construction to understand. While the competition was tough, we pulled together a list of the top 5 knitting books on our shelves that every knitter must have on their bookshelves. Hopefully you enjoy them as much as I do! Happy knitting!
Weekend Knitting whisks you away to an enchanting world of knitting. Falick not only shares a diverse pattern collection from various artists, but also includes whimsical ideas, baked goods recipes and a list of movies and books where knitting takes place! Each pattern is well written and some even help walk you through customization so you learn as you go. Savor every moment of reading this knitting book and trying out each pattern.
Ok, on this one the striking color combinations and rich texture on the front cover drew me in, but the contents led me to purchase. No-Sew Knits includes a rich array of patterns for diverse skill levels that are (as the name suggests) finish free! I love that once you’re done knitting one of these patterns, you don’t need to dedicate oodles of time to add finishing details. Just block and wear!
Both sweaters and accessories grace the pages of Metropolitan Knits which features intriguing patterns for the chic knitter. Projects include beautiful lace designs and chunky cables while most projects are made using a traditional construction method. If you love using your DPN’s then check out the Opera House Mitts which include a three dimensional diamond motif.
Amazingly easy book to navigate, Vogue Knitting: Very Easy Sweaters takes you through various stitch patterns and garment shapes to quickly find the perfect sweater to knit. The book is logically divided so you can find what you need quickly and all the patterns actually are fairly easy to knit from a construction standpoint. Check out our full review for more info.
I’ve seen lots of books proclaim they hold the perfect patterns to complete knit wear wardrobe, but non of them deliver like this book. Dressed in Knits features beautiful, wearable patterns that will stand the test of time. I especially love the creativity combining various yarn weights within a project and even the drop dead gorgeous lace panel featured on the Montreal Cardigan pattern.
Ever look around and feel like there’s a mini baby boom going on? Sometimes I look around and see my friends, coworkers and family scrambling to get ready for their new little bundle of joy. Many knitters and crocheters have one go to gift for new babies. Personally, I need more variety in my projects and also love to have several projects on my needles and hook at the same time. It makes life much more interesting.
Baby blankets are super popular, but even within the blanket realm, there are tons of options. One that I’ve recently fallen in love with the the Mini Lovey Blankie Menagerie by Lorraine Pistorio. These little security blankets feature a 12x12” blanket with a little animal head (and arms) on the top for baby to cuddle up with. Before choosing to purchase the Mini Lovey Blankie Menagerie, I did lots of research first to find a lovey that would fit my knitting needs. I prefer to read a pattern through before choosing to make it, but with paid patterns I pretty much feel like I need to commit before adding the pattern to my cart. So how did Lorriane Pistorio’s pattern make the cut?
I chose to knit a lovey for my coworker’s baby, Andrew, for several reasons. First, I wanted something a little more unique. In all seriousness, not sure how unique this whole idea is, but I loved that it wasn’t the same old conventional baby blanket that I’ve made for friends in the past. Seeing there was a mini baby boom happening in my small world, I knew I had several baby projects on a deadline and I couldn’t take something on that was going to consume all my time. Knitting is a love of mine, but also need to keep my other commitments in check. A lovey seemed like it would be small enough to be portable and I could make progress in between appointments or while on the road (and in between my other projects!).
I used Red Heart Super Saver for the teddy bear head and arms and Big Twist for the main blanket and collar.
Once the project idea was sorted out, next it was time to find the perfect pattern. Lovies come in lots of different varieties. I checked my favorite pattern sources before making a commitment. Craftsy, Ravelry and Etsy were my first go-to sites to check out pattern options. I was open to either crochet or knit patterns, as I’m fluent in both techniques. Most of the crocheted patterns I found didn’t seem to be a good fit. Seeing that I was hoping to use a worsted weight yarn (more so for sake of time), the crochet versions seemed too clunky and the stitch definition seemed to overwhelm the small animal part of the lovey because the stitches were rather large in comparison to the animal head. So knit it is!
I read lots of comments and reviewed projects that other people made with the patterns that made it to my short list. Ultimately I chose the Mini Lovey Blankie Menagerie because I was looking for a pattern that I could knit up on straight needles. I don’t enjoy working small projects in the round and this pattern is worked flat and seamed after each piece is bound off. Another added bonus? The Ravelry rating was high and the pattern was popular. The other big thing that tipped me over the edge was that this pattern comes in 6 different animal head patterns: bear, sheep, monkey, elephant, bunny and pig. The pattern also includes two blanket styles! No more boredom here! I could potentially make this project several times for different people without feeling bored. There seemed to be lots of versatility for the $6 price tag on the pattern.
Instant downloads are amazing by the way. I was off knitting that night. I chose to knit the bear lovey for Andrew and thought that I’d start at the fun part, the bear’s head. Andrew’s mom had a delicious nursery planned featuring Tiffany’s blue. I chose a baby yarn in a similar shade, Big Twist Yarns, Baby Solids as the main blanket and decided to go with Red Heart Super Saver for the bear for washability. Both yarns are acrylic and had the same washing instructions.
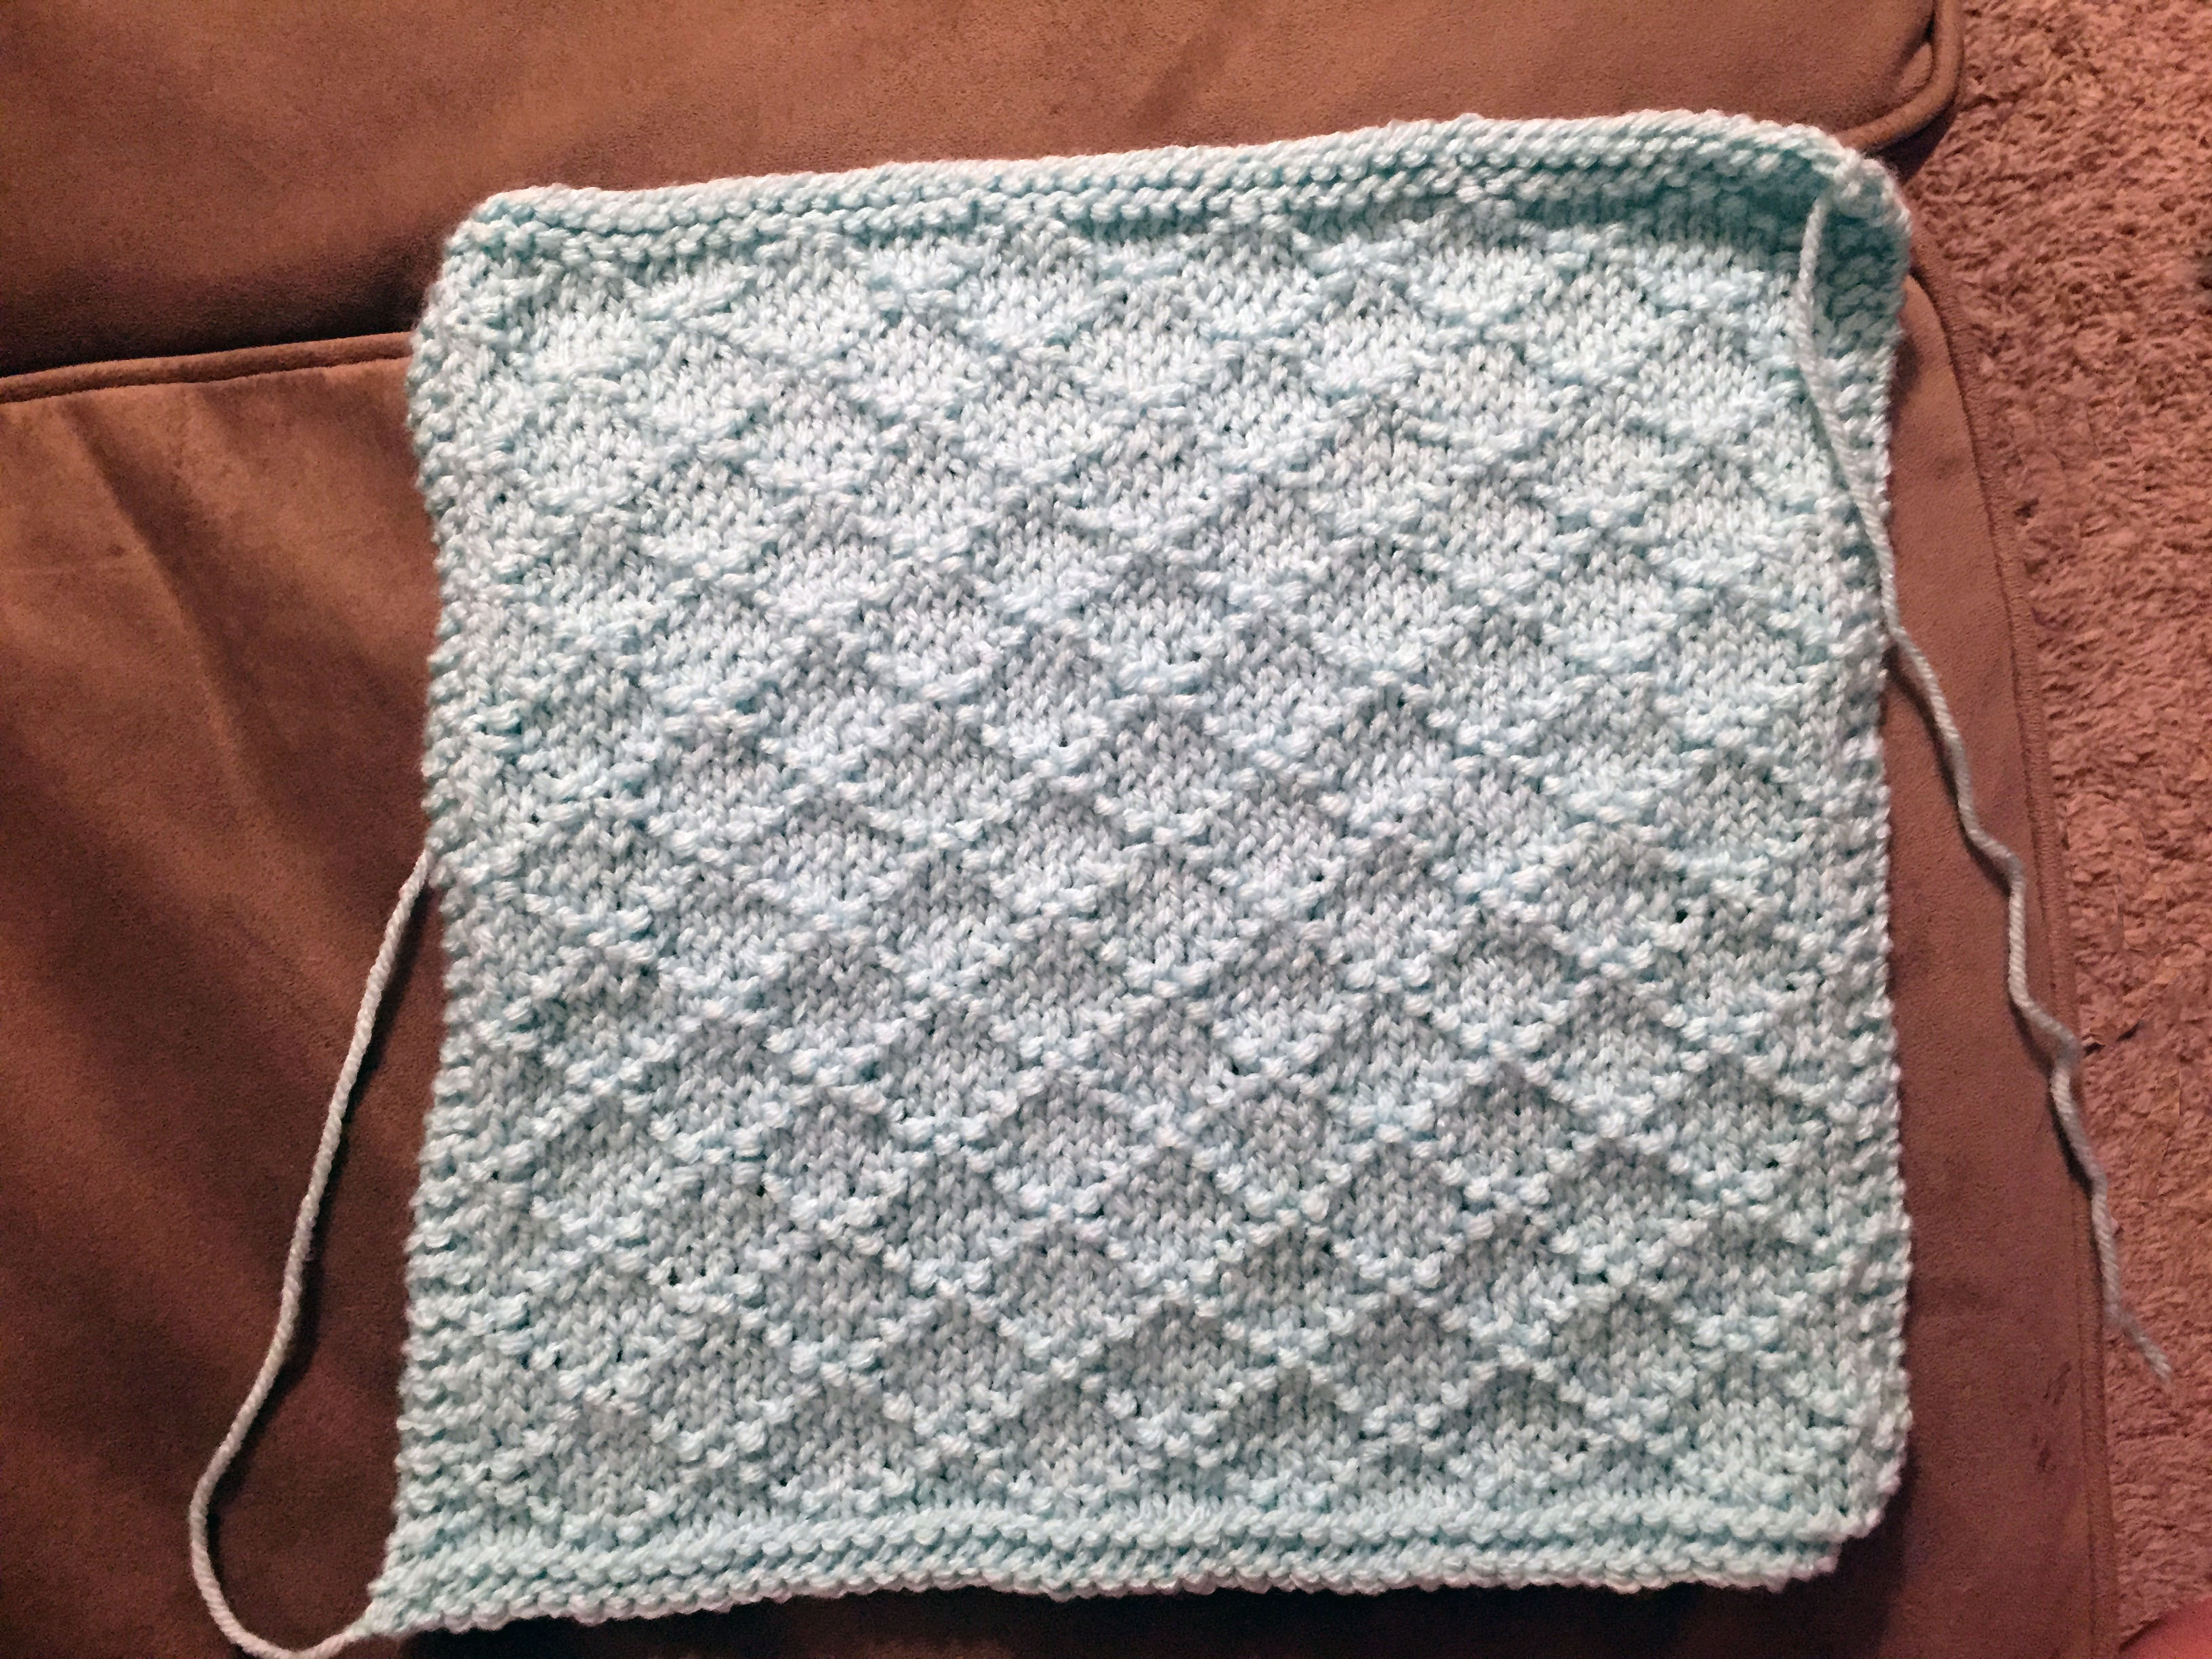
This is the diamond stitch in progress. We have a winner!
The bear head worked up in under and hour. The 27 rows went quickly and the instructions were super easy to follow. This gave me lots of confidence in the project despite how daunting it seemed when I started to read the 15 page pattern. Yes, really- 15 pages! I almost instantly regretted my purchase when I downloaded the the pattern and opened it up for the first time. The PDF is super long for such a small project and there is a ton of text jammed on each page. There are images, but at first glance it’s really confusing. So I took a deep breath and started to read at the beginning and make sense of everything.
The first page includes the materials you’ll need depending on which pattern you choose to knit. It’s organized by heading where then you can find information about the requirements for the blanket and each animal head. Thankfully these were broken out separately for simplicity. The skill level recommended for this particular pattern is intermediate. I thought this seemed a little over cautious during my knitting, but then I had to assemble the darn thing and decided that intermediate is just right. 🙂
I chose to use a different stitch pattern for the main blanket than recommended in the pattern. Love the result!
The second page covers pattern notes and the blanket pattern options included in the pattern. The yardage for each piece of the pattern is broken out separately. This is incredibly helpful so if you’d like to make the collar and blanket different colors, you know how much yarn is needed.After starting to knit the blanket- I chose Blanket B in the Diagonal stitch, I was having a miserable time. At the rate I was knitting, Andrew was going to get his blanket on his 5th birthday. I found the stitch pattern boring to knit and not very fun at all. The suggested blanket patterns are rich with texture, but I just couldn’t keep going with it. I frogged that blanket, which was only as big as a large bookmark, and looked for another stitch pattern that would prove to keep my interest for the 12x12” blanket. I chose a one sided diamond pattern because it had an interesting 8 stitch, 8 row repeat that would keep my attention for the duration of the project. (Pattern provided below.) Being that the background of this pattern was stockinette stitch, I added a garter edge on the blanket to keep it from rolling. Usually I stay away from non-reversible stitch patterns on blankets, but this was an exception because the blanket would be folded into itself and there was a definite right and wrong side when the blanket is being used.
The pattern for the collar is on page three and then the animal heads begin! The instructions are clear and easy to follow. Photographs are included for additional clarity and include notes to eliminate confusion. Page 5 goes into more detail about how to finish the arms and collar. This is a little weird because if you didn’t make the lamb, you actually have to flip backwards in the pattern for your finishing steps. If you made the lamb, you only use the first five pages of the pattern.
I use a sophisticated blocking system: bathroom sink.
Once all the knitting is complete, you are ready to add safety eyes (I used 9mm instead of the 7.5mm called for in the pattern) to the head. The instructions aren’t super clear about blocking. I actually added the safety eyes then stuffed and seamed the head before blocking. Don’t do this. Next time I would block the knitted pieces before stuffing and seaming. I chose a polyfil for the stuffing because it would dry somewhat quickly when mom goes to wash the item, and the stuffing did dry fairly fast after blocking, but I had a more difficult than necessary time shaping the head once it has been soaked in a tub of water.
This project actually sat in my WIP (work in progress) pile for several months after it had been knitted up and blocked. The idea of attaching all those pieces was not my idea of a good time. So what if I’m the type to knit a finish free garment from the top down…? I digress. Anyways, I finally brought all the pieces back out to start seaming the arms and assembling the whole thing. When you go to do this, make sure you can set aside some distraction free time. This is not the time to watch TV while trying to get all these pieces lined up just right.
I used these stitch markers to secure the ears to the head during finishing.
My least favorite part was attaching the ears to the head. The ears are on the larger side, and trying to make them symmetrical was challenging. I used removable stitch markers to temporarily hold the ears in place on the head as well as a couple extra yarn needles which acted like straight pins. Somehow the head and arms got turned when securing them to the blanket. I decided to roll with it, and it still turned out great. Tip- use yarn the same color as the blanket for this part because the yarn will be visible on the underside of the blanket.
Overall the lovey turned out amazing and I was super happy with the result. There’s always a small amount of uncertainty when giving a handmade gift to someone, but in this case it was a home run. Baby Andrew loved his new toy and immediately started to chew on the ears (thank goodness I went over those seams twice!) and the bear’s arms. This was most certainly a successful project. The pattern was awesome and I’d highly recommend picking up a copy for yourself!
If you’re looking to use the diamond pattern as a background for the blanket, or even would like to use it for another project you’re working on, here are the instructions:
Cast on 57 stitches. This pattern requires you to cast on a multiple of 8 stitches plus 1. I knew I wanted a garter stitch edge. The garter stitch edge I did was 4 stitches on each side of the pattern repeat.
For the blanket shown:
Work 4 rows in garter stitch (knit each row.) For a clean finished edge, I slipped the last stitch on each row as if to knit.
Begin pattern repeat with garter edge:
Row 1 (RS): k8, *p1, k7; rep from * to last 9 sts, p1, k8.
Rows 2 and 8(WS): p4, p3, *k1, p1, k1, p5; rep from * to last 10 sts, k1, p1, k1, p3, k4.
Rows 3 and 7: k6, *p1, k3; rep from * to last 7 sts, p1, k6.
Rows 4 and 6: k4, p1, *k1, p5, k1, p1; rep from * to last 4 sts, k4.
Row 5: k4, *p1, k7; rep from * to last 5 sts, p1, k4.
Row 8: k4, p3, *k1, p1, k1, p5; rep from * to last 10 sts, k1, p1, k1, p3, k4.
Rep rows 1–8 for diamond pattern
If you’d like to use the diamond pattern on other projects, use the core of the pattern repeat:
Row 1 (RS): K4, *p1, k7; rep from * to last 5 sts, p1, k4.
Rows 2 and 8 (WS): p3, *k1, p1, k1, p5; rep from * to last 6 sts, k1, p1, k1, p3.
Rows 3 and 7: k2, *p1, k3; rep from * to last 3 sts, p1, k2.
Rows 4 and 6: p1, *k1, p5, k1, p1; rep from * to end.
Row 5: *p1, k7; rep from * to last st, p1.
Row 8: p3, *k1, p1, k1, p5; rep from * to last 6 sts, k1, p1, k1, p3.
Looking through the library shelves of my locallibrary, I was in search of a special knitting pattern to make for my nephew, a recent addition to our family. A yellow book jumped out to me, Wee Garter Stitch: Must-Have Knits for Modern Babies & Toddlers by Vicki Howell. The book featured a cheerful little girl on the front and it seemed that most the patterns would work up quickly, as they were all in garter stitch! I added it to my pile of books to check out and headed home. After reading through the patterns offered in the book, I narrowed my choice down and decided that the Baby Cable Cardi would be perfect!
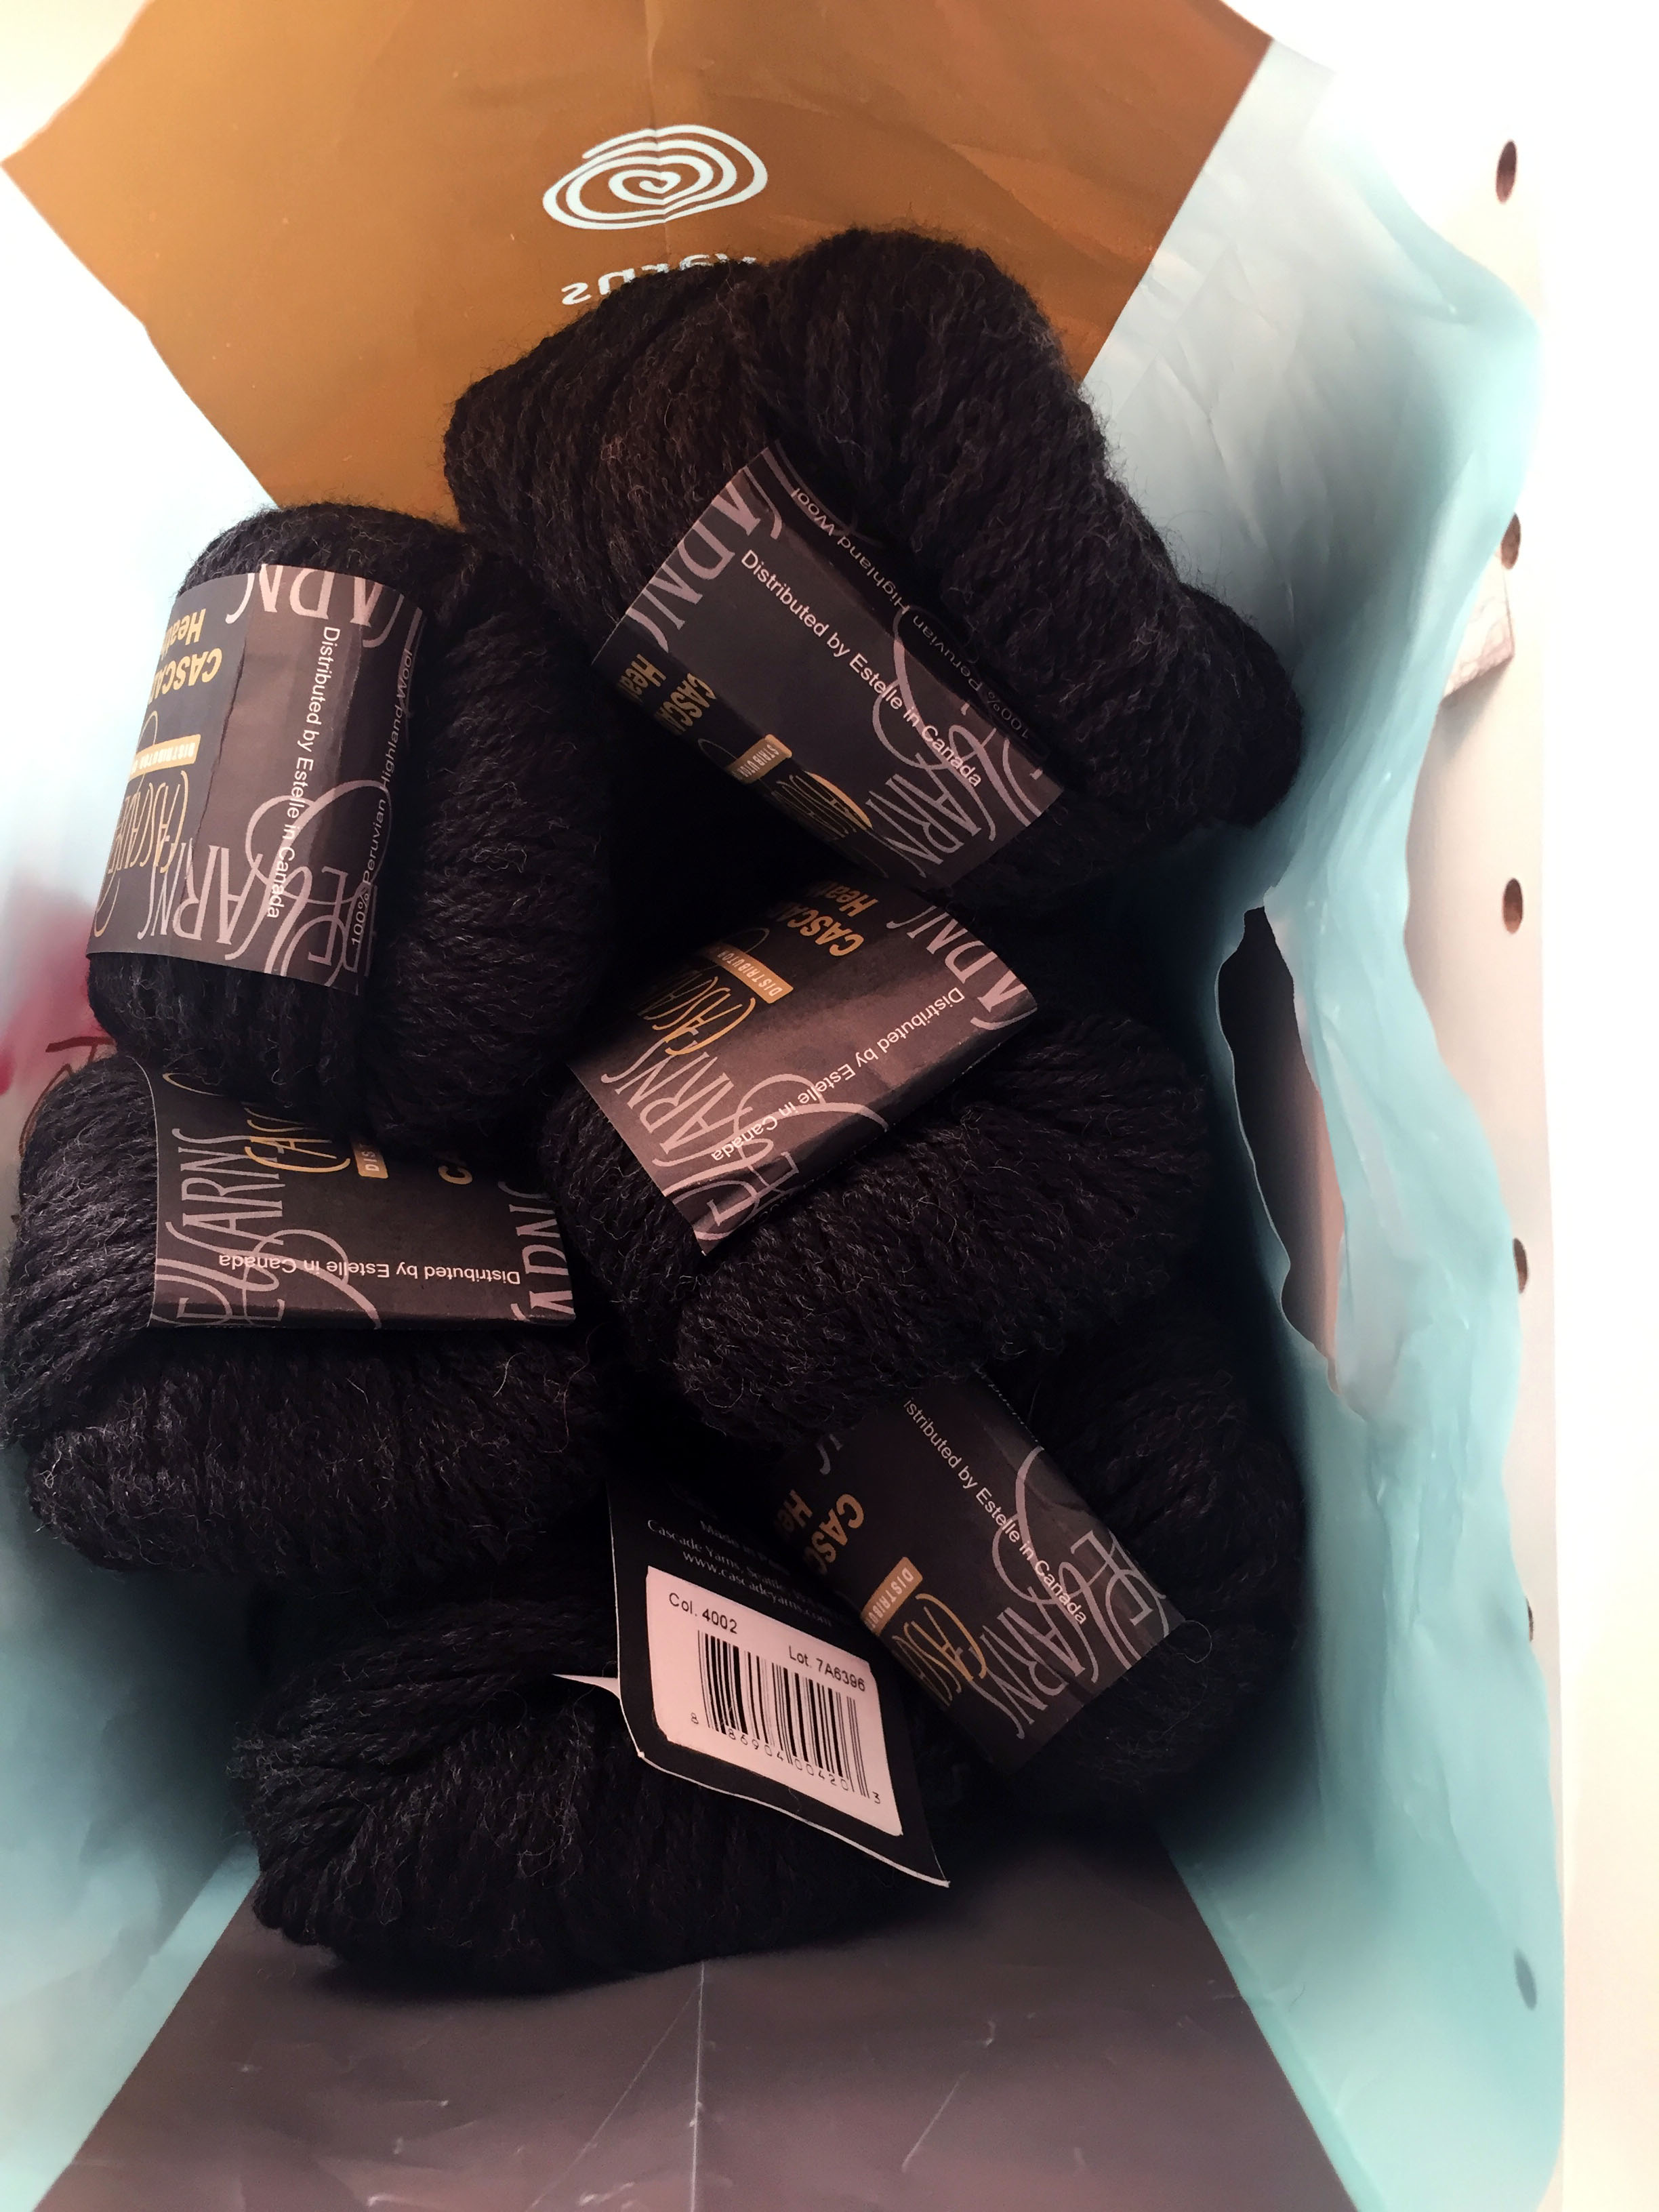
Sometimes I think knitters are so passionate about finding the perfect fiber for a project, they forget about who is using the end result. In this case, I was knitting something for my 7 month old nephew. His mom is a busy lady, as she’s chasing after three small humans under the age of 5. I wanted to choose a yarn that would be easy for her to care for and soft enough for the baby to cuddle up with and would keep him warm. I chose an acrylic yarn from my stash- Red Heart Supersaver Fleck in Buff. While not super luxurious, it would stand the abuse of a washing machine so my nephew could get many uses from the sweater, keep him warm and his mom didn’t need to treat the sweater differently from the other laundry she was already working on.
The pattern is condensed onto two pages of pattern instructions and an extra page of photography. This yarn was perfect for a durable baby sweater!
Once all the decisions were made, I got out my knitting needles and started the gague swatch. Not sure how it happened, but my little swatch was much taller than what the pattern called for, but the width was perfect. What to do… I decided to risk it and cast on for the sweater.
This particular pattern is worked top down. The ribbing along the collar it worked first then transitions to the body of the sweater. Stitch markers are placed and the shoulders, chest and back are shaped using yarn over increases in relation to markers. This adds an eyelet detail to the raglan shaping which has a nice touch in the beginning, however this detail is not carried through the entire sleeve shaping and ends abruptly. Next time I make this sweater, I will be using M1 increases instead of yarn overs. Given the weight of the yarn, the eyelit detail created using the yarn over method are large enough for small fingers to pop through when the baby is being dressed. This is also the same method used to create button holes on the ribbing during the finishing stage of the project. Once the project was complete, I had wished I used a different technique.
The cable detail runs along the button band and button hole bands and is on a garter stitch
This cable detail reads more like a texture and less like a cable. If you look closely, you can see one of my mistakes in this shot!
background. The cable running along the front panels of the cardigan seemed to be a fun detail, but felt more like a nice texture. I probably wouldn’t change how the cable is handled when creating the next one, but next time I’ll be sure to have the same number of stitches between the cable detail and the button/button hole bands! (Whoops!!) How I didn’t realize that mistake until the sweater was half way done is beyond me!
One thing that drove me crazy with this pattern was how future rows were handled. The pattern specifies the beginning of and tells you to continue for 8 rows more. This was confusing. I literally had to write out the cable pattern and how many stitches there would be after the row was complete and noted where the increases fell to ensure I was following the pattern correctly. It also drives me banannas when a pattern states to work a sleeve (or other piece that needs to be exactly symmetrical to something else) to a given dimension. Assuming your gauge is accurate, this theoretically shouldn’t be an issue, however I like certainty. So I counted how many works I worked the sleeves to ensure they were exactly the same. This is literally just a pet peeve of mine personally, Vicki didn’t do anything wrong.
The pattern overall was a bit fiddly. There was a huge mental component to counting rows, checking repeats and trying to decipher the pattern every time a new section began. I’d recommend this pattern for more seasoned knitters, if you’re a beginner, steer clear of this pattern and try some of the others in the book.
Regardless of the difficulties, my sister in law opened the box and thought that the sweater was purchased. Maybe it was the squirmmy seven month old in her lap, maybe it was all the excitement from the day, but I consider that a success!
If you’d like to pick up a copy of Wee Garter Stitch: Must-Have Knits for Modern Babies & Toddlers check out Amazon or your local library!
I never really understood seasonally knitting and crocheting, that is until this past summer… Many knitters and crocheters trade their crochet hooks and knitting needles for gardening or other warm weather activities. This was always a mystery to me, until I accidentally did the same this past summer! For some it’s a conscious choice, for others, like me it just happens. This summer flew by and was nice and hot as far as Chicago summers go. I knitted until the end of May and then got caught up in all kinds of other activities. Nights were spent out with friends and weekends were spent running in preparation for a race. Now that the summer is winding down, it’s time to get back on track!
Here are some great ways to get back into the knitting groove!
Make a list
If you’re like me, you have a mental list of all the people you’d like to make Christmas presents for or projects that you’d like to make. That list will be much easier to conquer if you write it down, check it twice and start figuring out what you’re making for whom. Once the list becomes tangible, it’s easy to evaluate if you’ve bit off more than you can chew and help prioritize and set timeline benchmarks for all your projects! I especially love making my list in Google Sheets or Excel because I can make columns for the yarn I’m using, assign due dates of when I need each project completed by, note the project and pattern I’m using, the possibilities are really endless! If you’re not into Excel and don’t want to create your own sheet, then use Ravelry’s favorites option or add the projects to your Revelry queue.
Get Organized
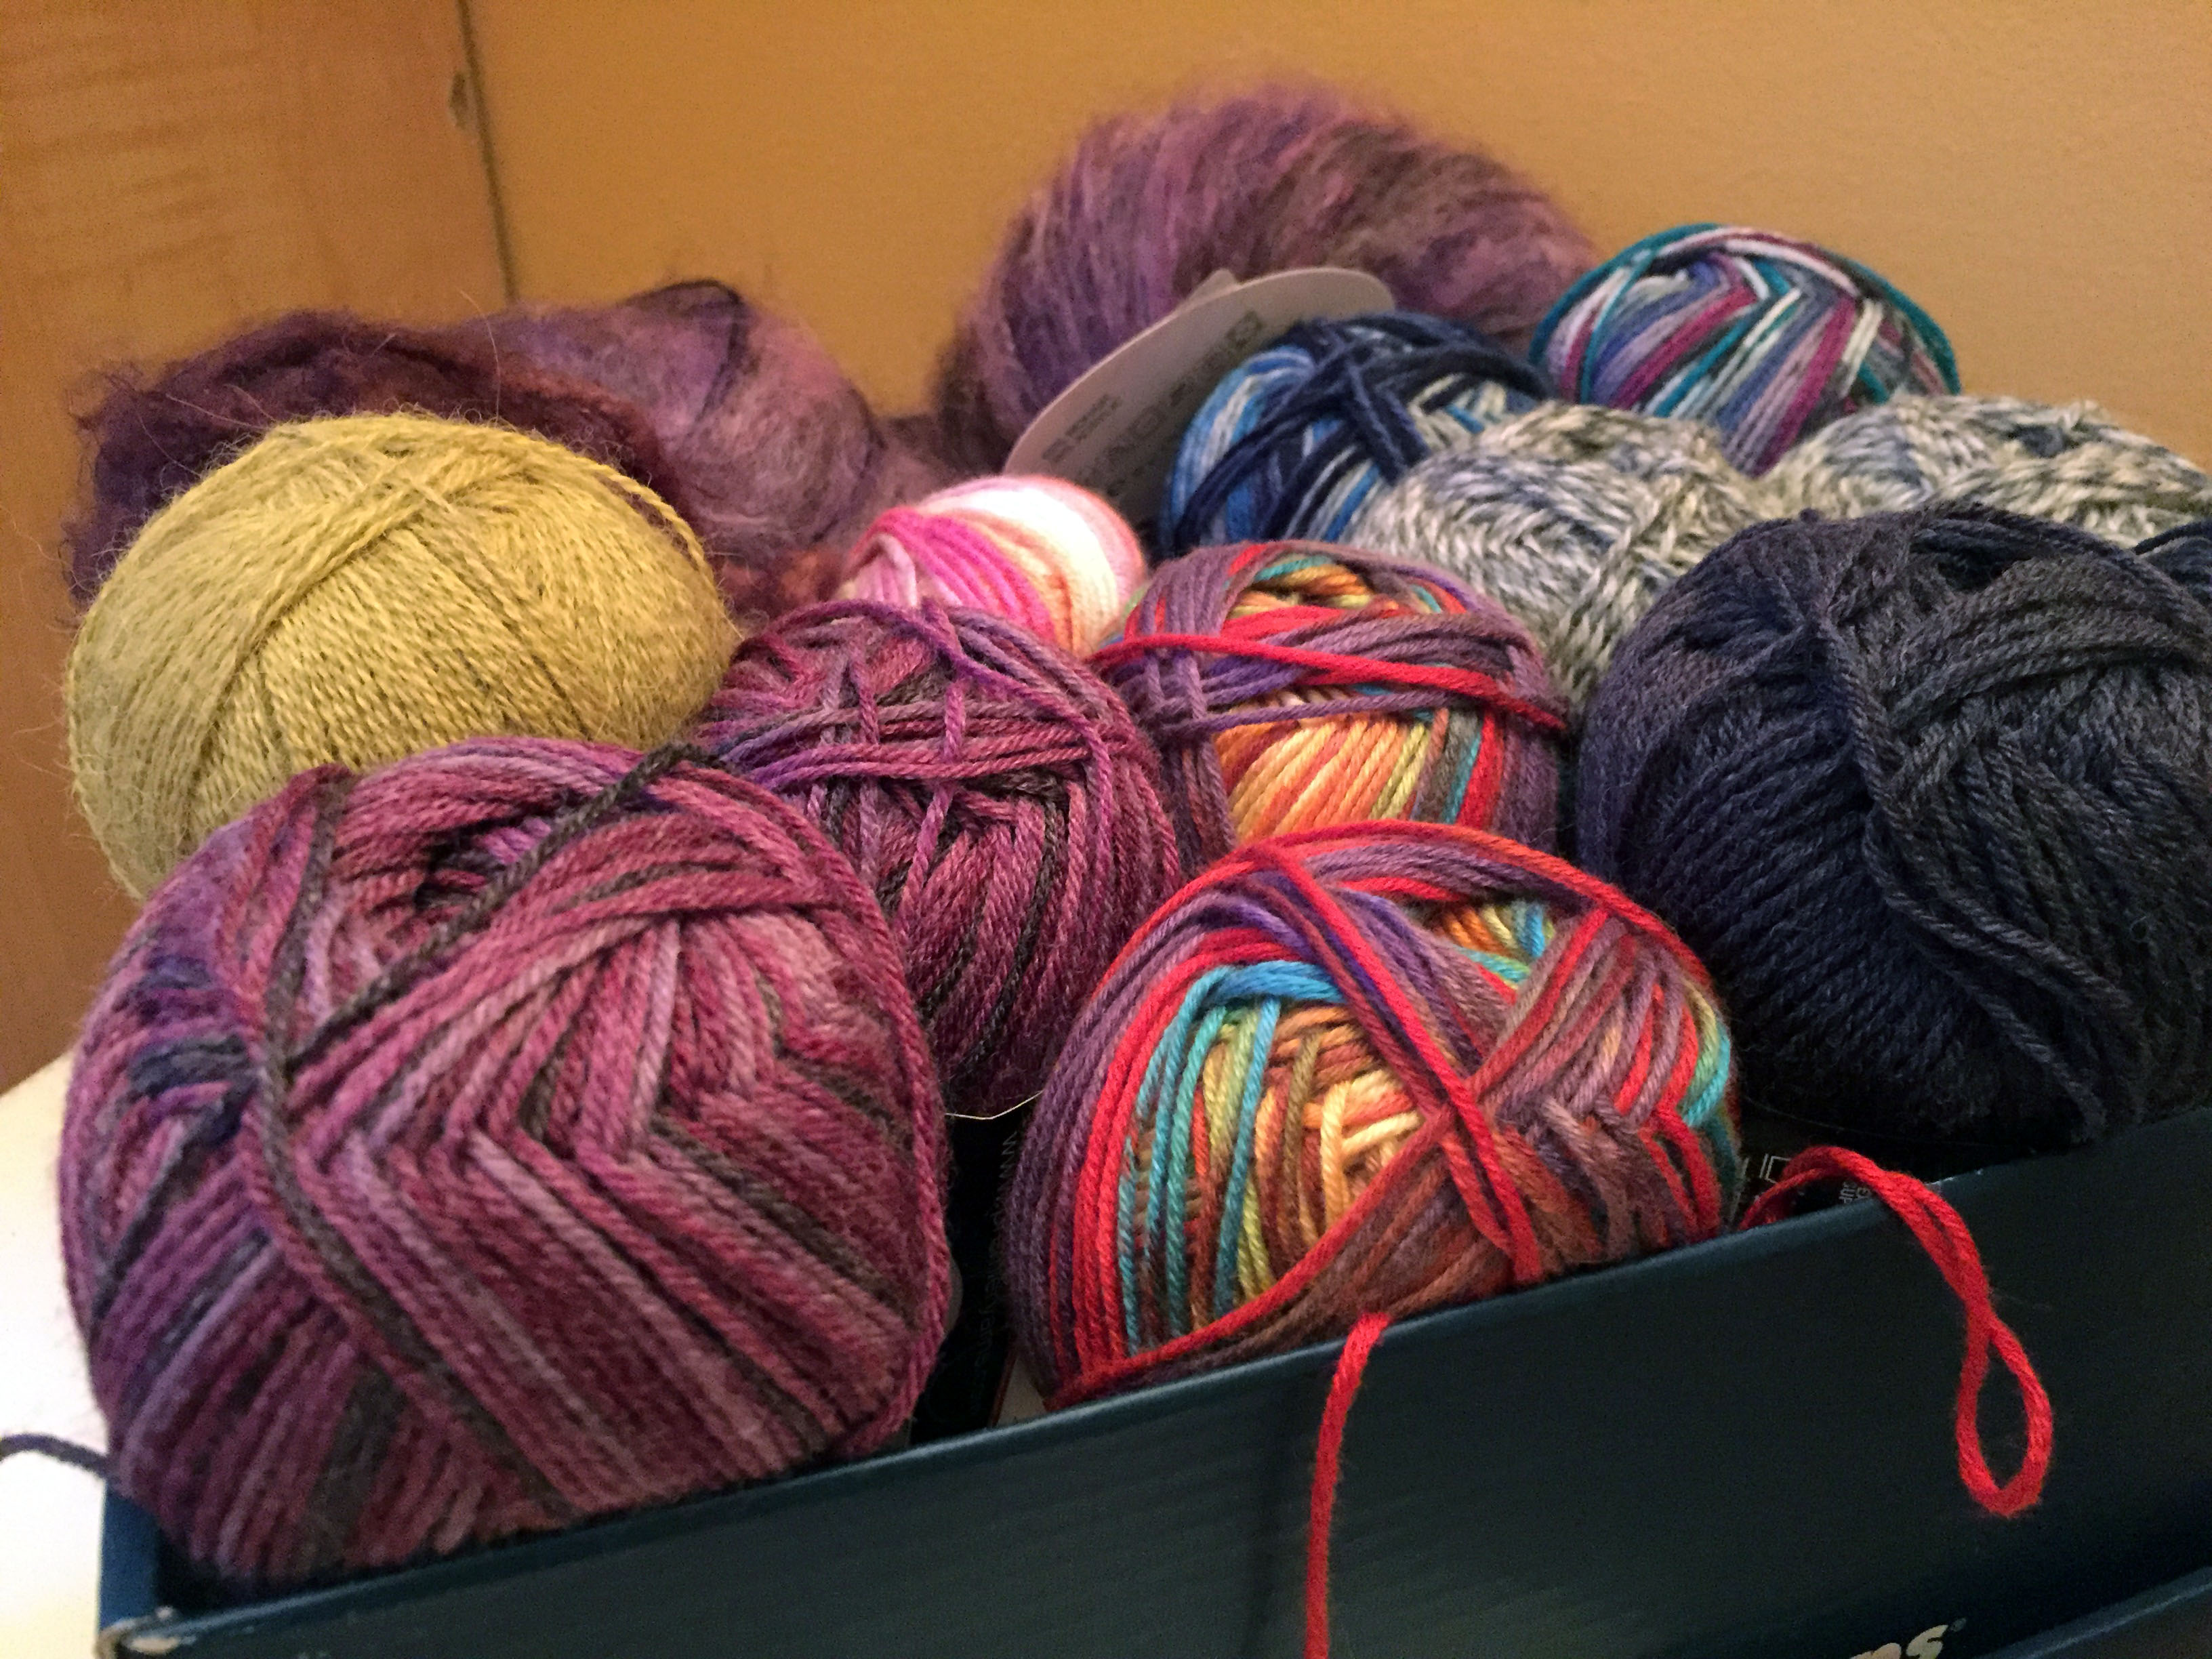
Grouping like yarn weights and colors together helps to locate yarn quickly!
Notice how sometimes knitting needles and yarn seem to find their way into odd pockets of the house? Or how an impulse purchase never quite made it to your Revelry stash list? Now is the time! It’s so easy to get inspired by your yarn collection and think up amazing projects for each skein in your collection (AKA stash.) Winding down the summer I’ve been reorganizing my yarn stash and getting everything uploaded to Revelry. With the exception of odd bits that I picked up at a thrift store, it’s making pattern searching and shopping so much easier already. I’ve been dreaming up wonderful projects, trying to creatively mix and match various yarns in my collection and also determining what needs to get purged so I can make more room for beautiful fibers. If you have knitting needles strewn about, it’s time to get them organized as well, figure out if you have all the tools for the projects on your list and get your knitting books and magazines organized and in one place.
Shopping!
Part of the fun of knitting is visiting the local yarn store!
Now that your list is made and you’re fully organized, the next step in getting back into the knitting groove is to go shopping to fill in any gaps. While it’s good practice to pair as much yarn from your stash with your project list, sometimes it just doesn’t work out that way. This time you’re shopping with a purpose and if you plan strategically, you can support your local yarn store when they have specials going on, take advantage of clearance options and coupons at chain or online stores. I also like to take advantage of any local yarn store offerings when traveling. It’s so much fun to pick up a locally made yarn and tell the story to the recipient of the gift.
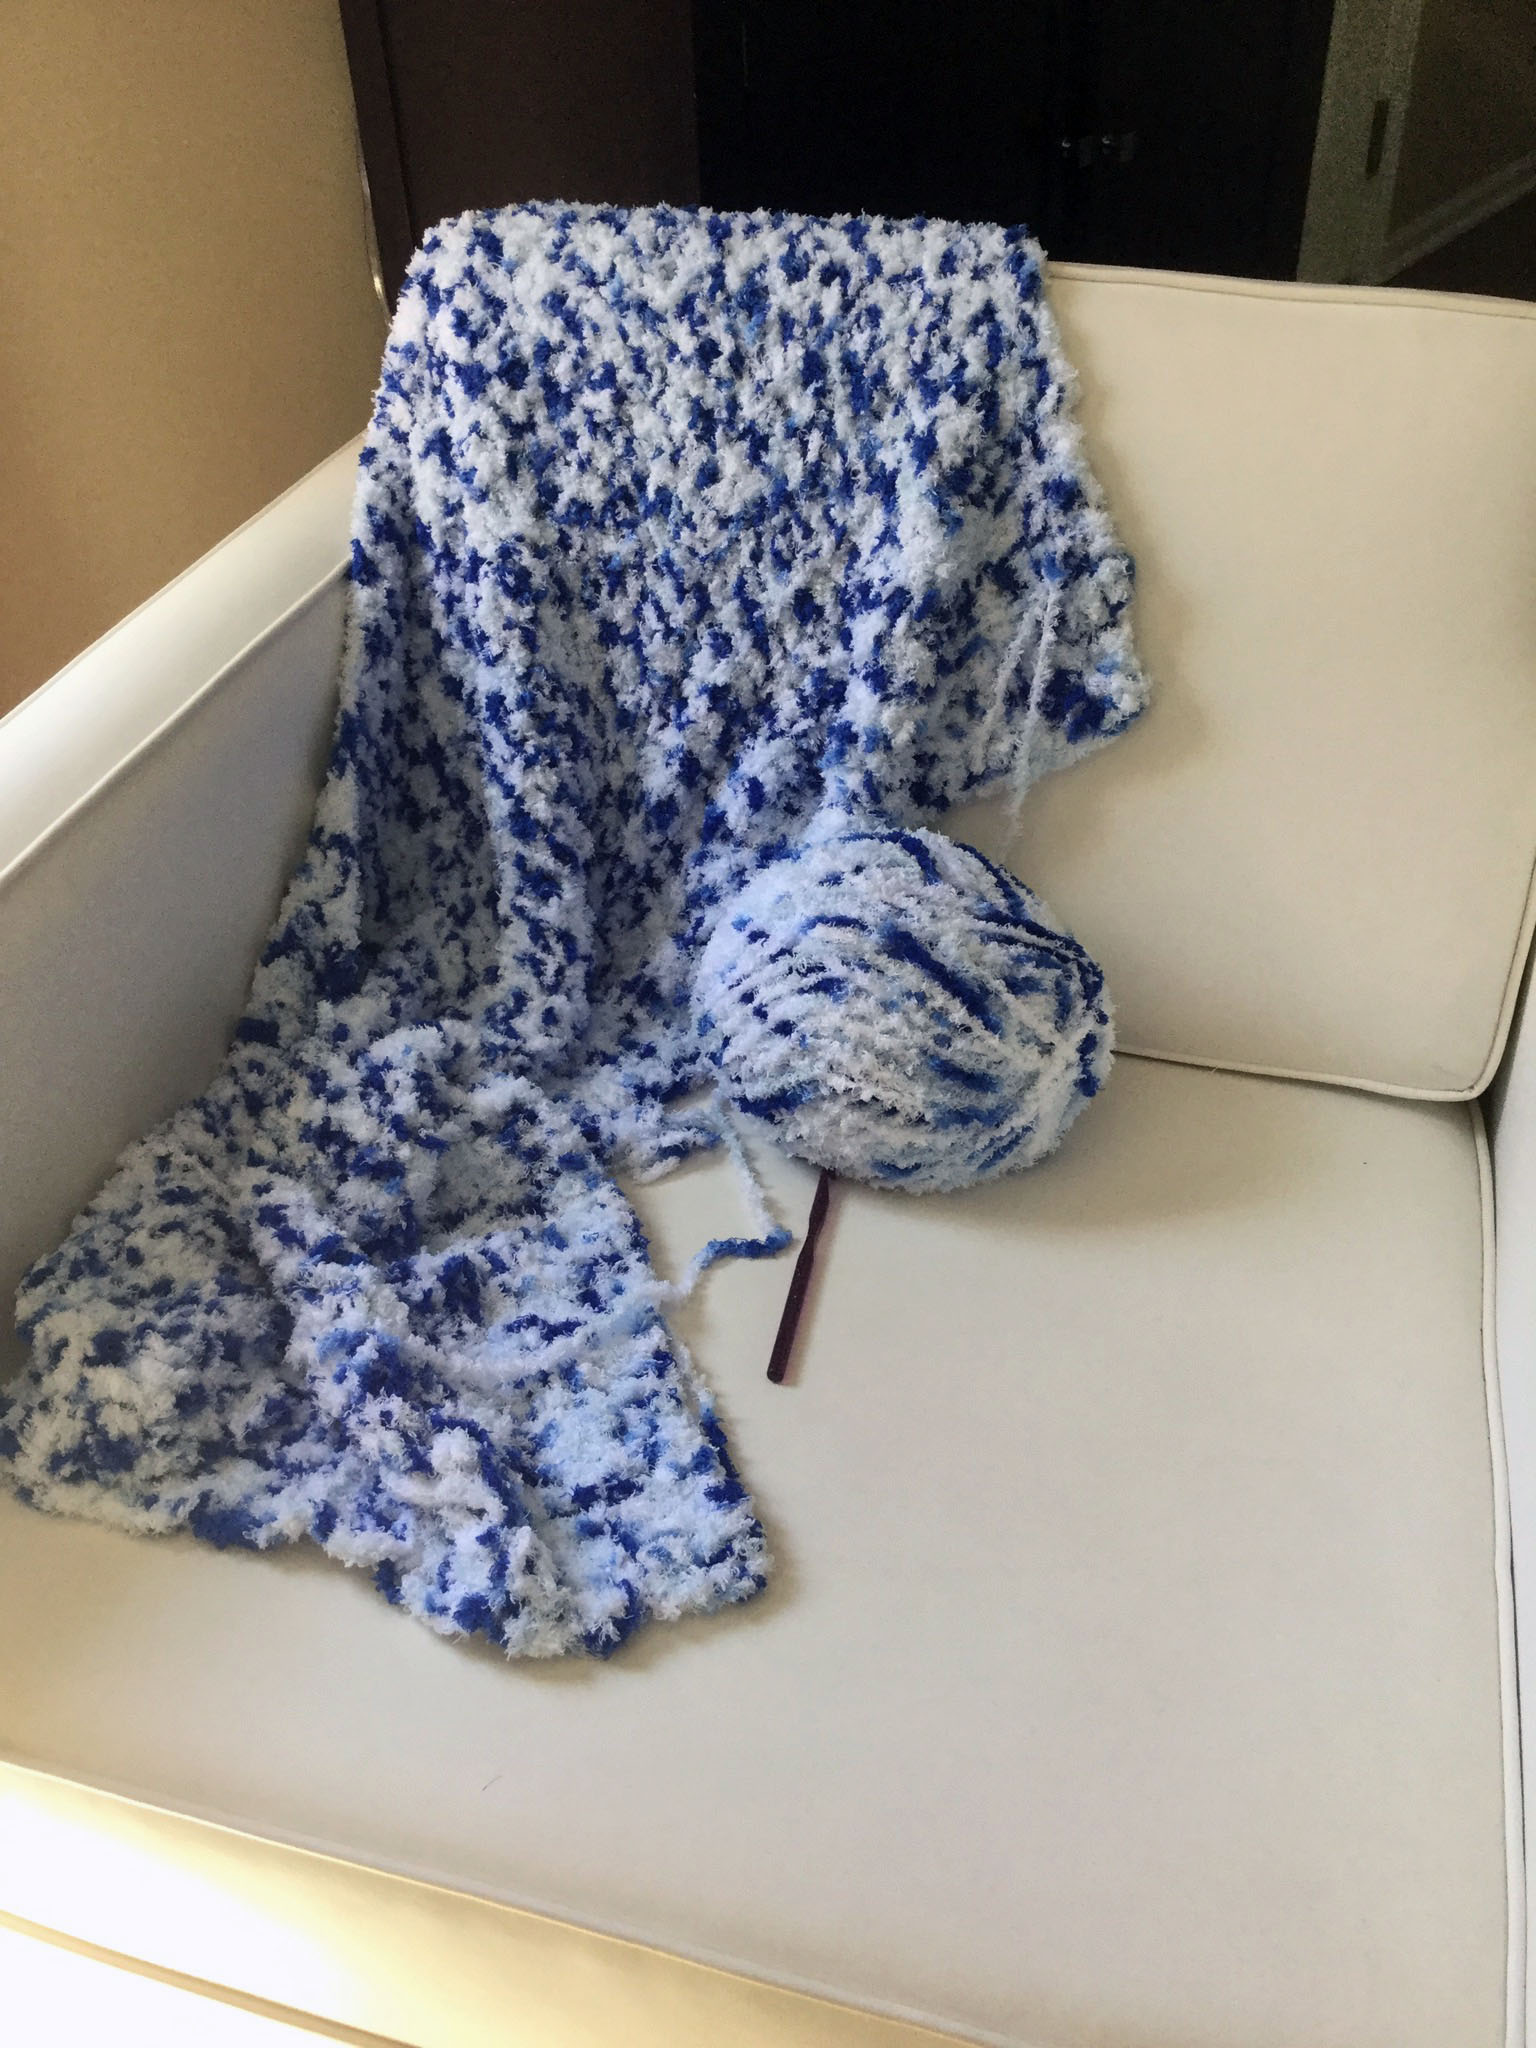
The promise of huge yarn sales led me to the yarn aisle at my favorite craft store. Browsing for something special, and suitable for a baby boy, I paced the aisles several times. The feel test was well underway and I was wishing for knitted or crocheted swatches of a couple of my favs. Pipsqueak was soft and mushy and it was clear that it would remain cloud like even after the blanket was made. So after checking out the free patten on the yarn band, I tossed three huge skeins of the yarn into my basket and headed for the checkout counter. So how did Pipsqueak perform?
The drape on Pipsqueak is amazing! This baby blanket is worked up in double crochet rows.
The yarn has an amazingly soft texture. The yarn is fuzzy and also has a great drape once a piece of fabric is worked up. Pipsqueak is easy to hold and the fibers don’t dry out your skin like other yarns do when working with them.
While working with bulky weight yarn typically means that the project will go fast, in this case, extra care is needed to find the stitches during a crochet project. My eyes had to stay on my project as opposed to watching TV and feeling my way through with just a few glances down. Using my fingers, it was necessary to find the next stitch, often stretching the fabric slightly to locate where to insert the crochet hook. Here’s a video demonstrating what crocheting with Pipsqueak is like!
So is Bernat Pipsqueak easier to knit with? Yes! Very much so! Knitting with Pipsqueak was much less laborious than crocheting. The stitches are easier to locate when working on knitting needles, the only thing that I had to watch out for was accidentally grabbing the stitch in the row below, but if/when that happened, the mistake was easy to catch and correct before moving forward. Want to see what I mean?
Stitch definition is low with Bernat’s Pipsqeak. The fabric turns into a soft cloud where all the stitches disappear. I especially liked how I was able to use a double crochet stitch with a larger than recommended hook size to achieve a soft and flowy blanket in a fraction of the time it would take with another bulky weight yarn.
Skeins are available in 100gm or 200 gm for endless color and pattern mixing.
Overall Pipsqueak was fun to work with and a great value. Bernat offers skeins in two different sizes, 100g and 250g, so mixing and matching the various colors within a project is easy and economical. My only disappointment was that I was looking for a light grey color to match a baby nursery and that color isn’t available despite how popular it is in today’s modern home decor. That aside, this yarn is great and I’d highly recommend it!
There are many variations of knitting bags out in the marketplace. Who know there were so many different ways to store and transport our yarn and materials?! Before I became a knitter, my WIPs (work in progress) used to get tossed around my home carelessly. Stitches sometimes came undone, but it was no big deal to add a couple double crochets to finish up a row that had partially become unraveled. Then I entered the world of knitting. It was scary to think that a stitch or even series of stitches could fall off my needle and cause lots of lost time or even ruin a beautiful sweater that’s in progress. Clearly I needed a safe harbor. Tossing a knitting WIP to the side just wasn’t going to cut it.
I began researching (does that make me a knitting nerd?!) what kinds of options were out there. The first thing I realized was how important needle tip protectors are. So a bought a package of those, but this still didn’t solve all my issues. I needed a place where my WIP, yarn and tools would be safe and sound (and not attacked by my dog or cats. What did I land on? I found two perfect bags that fit the bill.
The Art Bin Drum project bag is perfect for heavy duty project protecting!
My almost all time favorite project bag is this spiffy find! The Art Bin Drum is big enough to hold several skeins/hanks/cakes of yarn, set of knitting needles, Knit-Chek, knitting point protectors, yarn needle, crochet hook (for emergency fixes) and even comes with a small pouch for items that easily get lost in the shuffle.
I can usually get a couple of projects in this bag at one time
and love the adjustable shoulder strap and how you can feed your yarn through the top of the bag when working. The handle on the top is also sturdy and makes picking up the bag and hauling it up and down stairs a breeze. This bag is best for work at home projects, and not the best for travel, especially air travel.
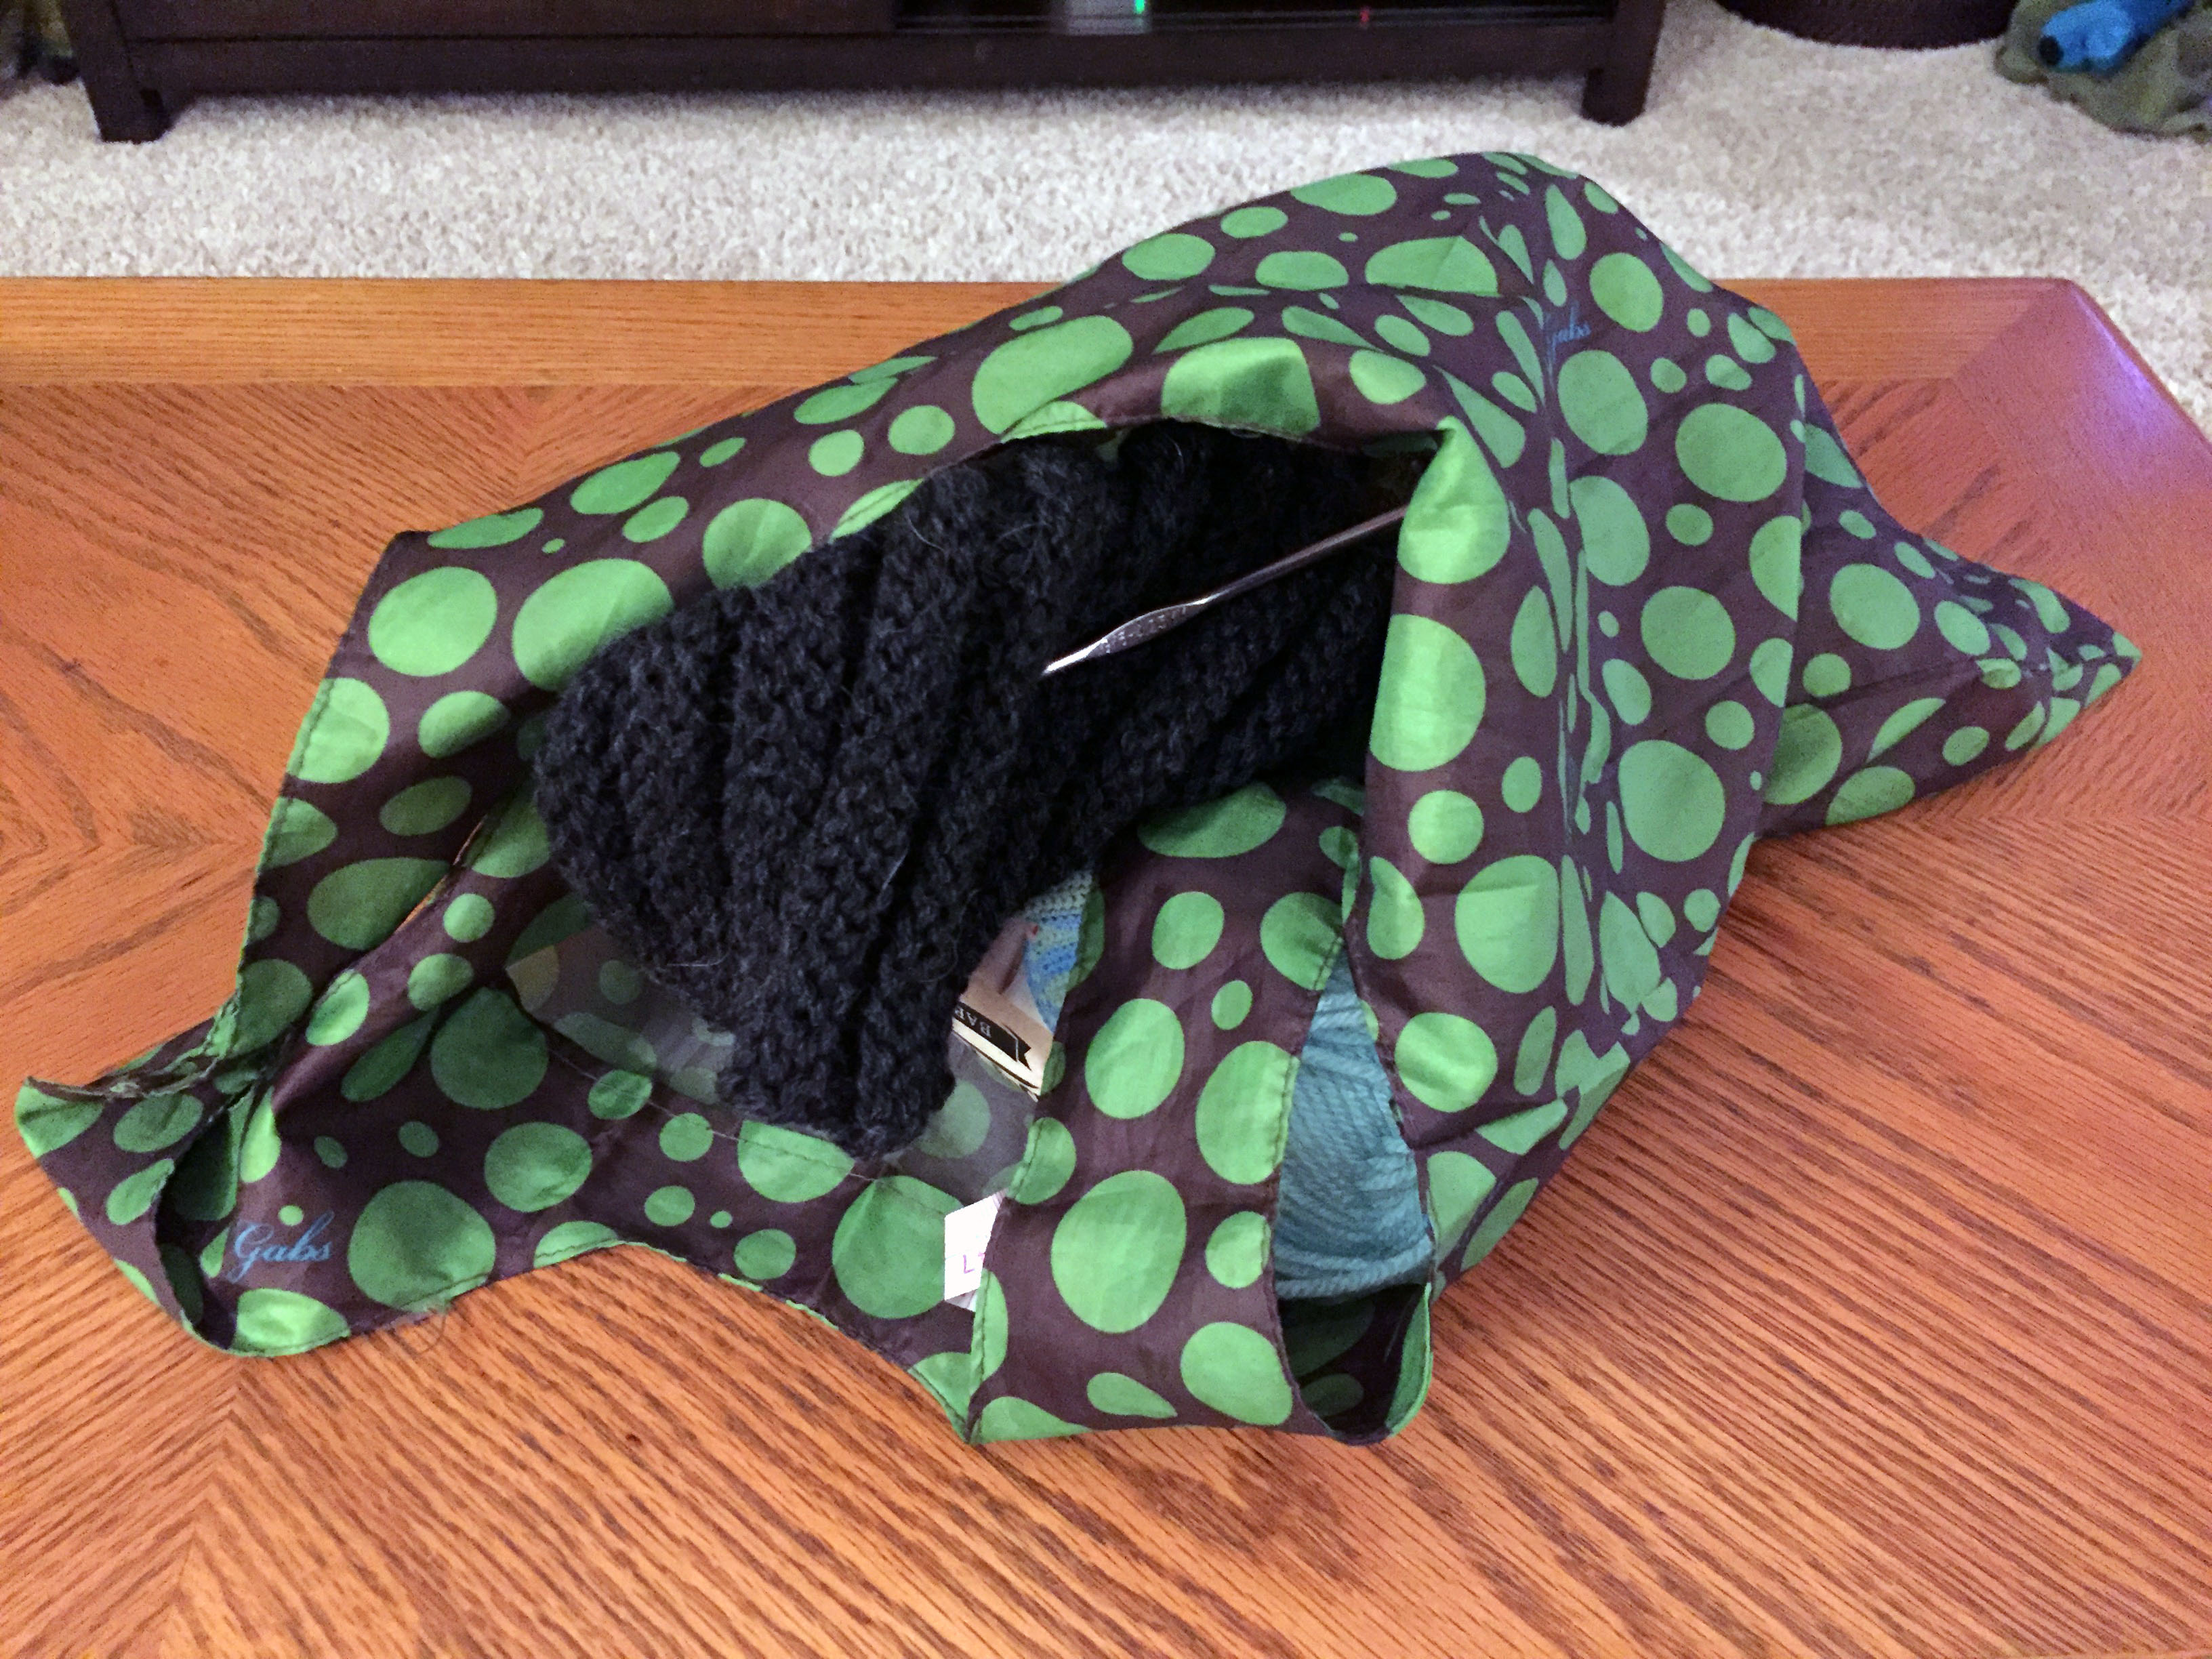
This lightweight bag is perfect for travel and keeping knitting safe!
When I was in Italy, I bought a beautiful leather purse. Later I realized that these purses were also available in the US, but I digress. Inside my new purse was a small envelope of nylon that held a folded up bag that expanded to a medium-sized bag. This has become my favorite knitting bag of all time. There are absolutely no frills on this thin bag. You can see the lumps and bumps of my projects contorting the bag into weird shapes, but it’s the perfect solution for travel, keeping a project safe and for working on a WIP around the house. This bag, thin as it is, also kept a knitting project safe from a dog attack! (Of course not my dog, another dog wanted to get his knitting fix in, but was unsuccessful.) Although I had to buy a leather purse in Italy to get my cheap nylon bag, you don’t! Here is a similar bag on Amazon that will fit the bill.
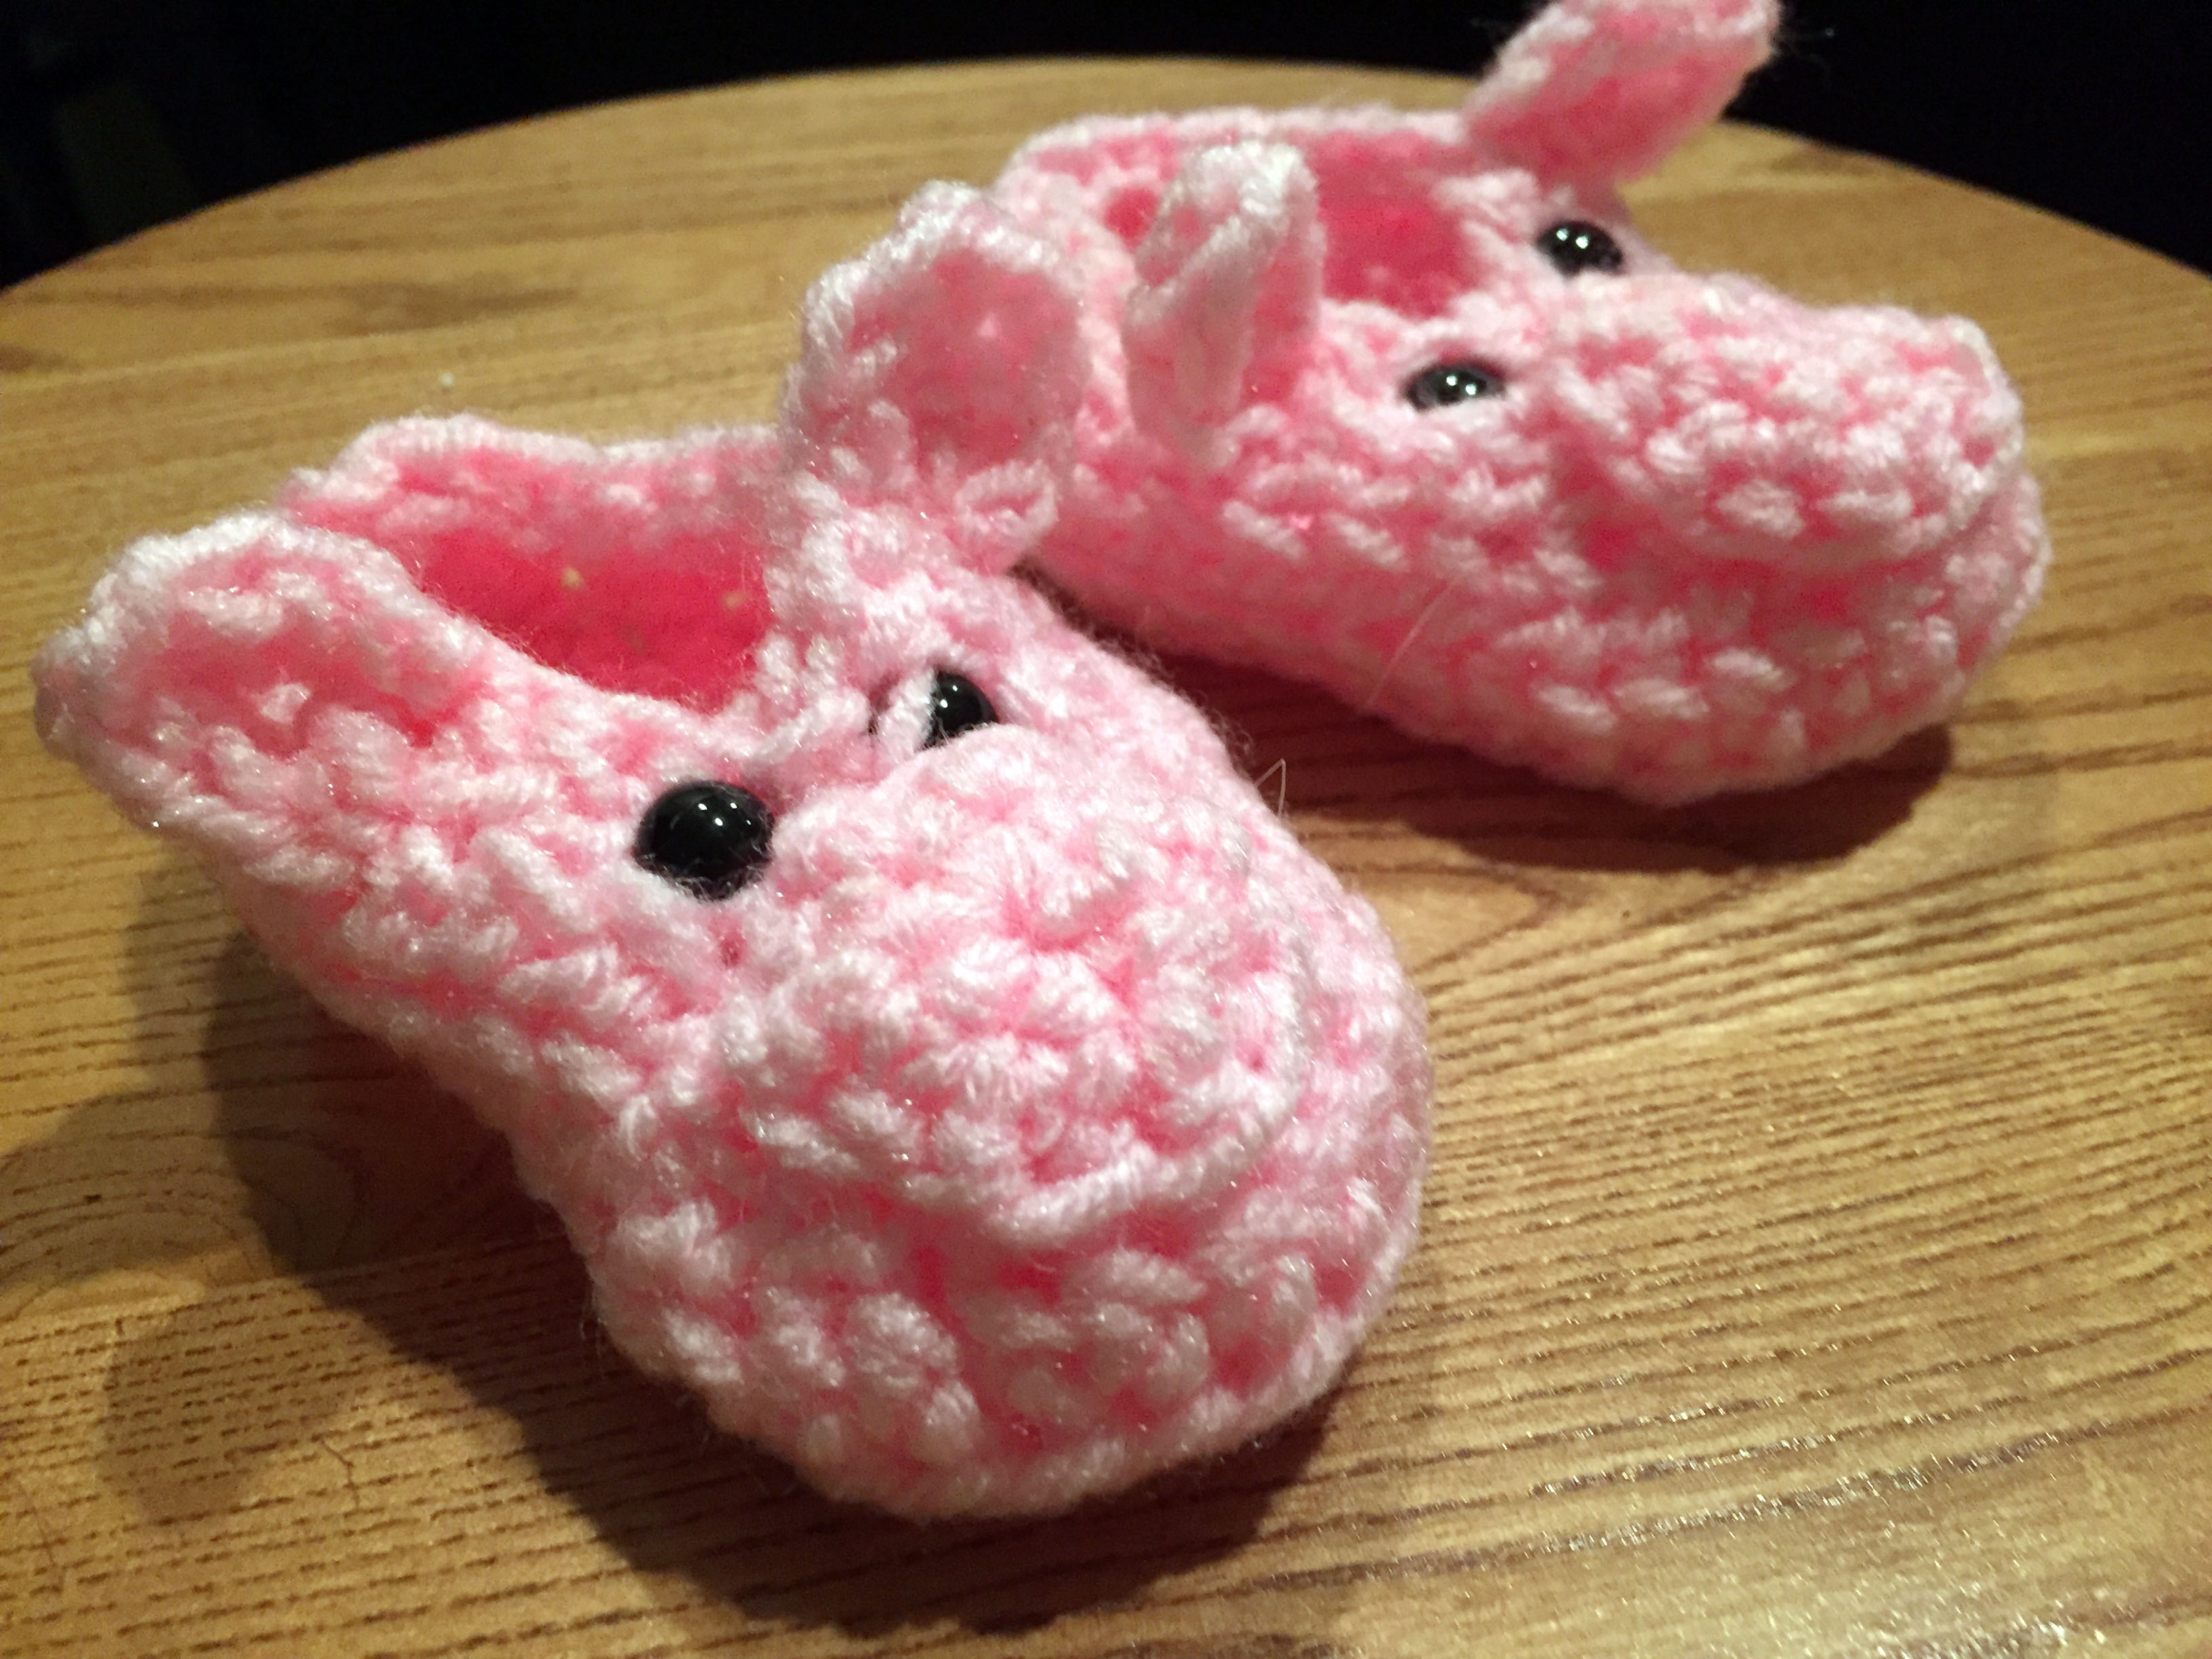
Looking for the perfect baby gift for a friend, I looked to Pinterest for inspiration. Having pinned loads of knitting and crochet goodies in the past, I went through my past pins for inspiration. There it was, the cutest little pink piglet baby booties! Enthusiastically gathering my supplies and starting to crocheting away, I realized that the pattern on my board was rubbish. Back to the drawing board.
With a little searching, I found a sweet little baby boot pattern on Red Heart’s web site. The boots weren’t exactly what I was looking for, but with a little modification, it could be just the right fit! I also swapped the yarn I was planning to use for Red Heart Super Saver that was in my stash. Red Heart yarn is great for baby and children’s projects because it’s so easy to care for. In the washing machine it goes!
Realizing that I’d need to make serious modifications, I thought about slippers I’ve made over the years and other baby booties that I’ve created and got to work.
Thankfully, the Warm Baby Boots pattern was the perfect base for my Piglet Booties. Following the instructions through round 6 gave me the perfect base to add ears, snout and eyes.
If you’re interested in the original pattern, you can check it out here. It’s really great and offers more coverage than the Piglet Booties below.
To make the Piglet Booties, grab your supplies and get crocheting!
Red Heart Warm Baby Boots Pattern, make through Round 6:
Bootie (make 2)
Ch 9
Round 1: Work 2 dc in 3rd ch from hook, dc in next 5 ch, 6 dc in last ch, turn to work along opposite side of beginning ch, dc in next 5 ch, 3 dc in last ch, slip st in top of beginning ch to join. – 22sts
Round 2: Ch 2, hdc in same st as slip st, 2 hdc in each of next 2 dc, hdc in next 5 dc, 2 hdc in each of next 6 dc, hdc in next 5 dc, 2 hdc in each of next 3 dc, slip st in top of beginning ch to join. – 34sts.
Round 3: Ch 2, hdc through back loop in each st around, slip st to top of beginning ch to join. – 34sts
Round 4: Ch 2, hdc in next 8 sts, [dc2tog] 8 times, hdc in next 9 sts, slip st to top of beginning ch to join. – 26sts
Round 5: Ch 2, hdc in next 8 sts, [dc2tog] 4 times, hdc in next 9 sts, slip st to top of beginning ch to join. – 22sts
Round 6: Ch 2, hdc in next 8 sts, [dc2tog] 2 times, hdc in next 9 sts, slip st to top of beginning ch to join. – 20sts
Begin boot modifications:
Round 7: slip stitch along the top of the bootie
Snout: (make 2)
Set-up: Using the magic loop method, single crochet 6 stitches into the loop and pull tight. Join with a slip stitch, chain 1.
Round 1: 2 dc in each stitch, slip stitch
Ears: (make 4)
Ch 2.
In second chain from hook: sc, hdc, dc, ch 2, dc, hdc, sc
Fasten off
Finishing:
Sew the snout onto the middle front of the bootie.


